tableView 上添加Tableview 实现左右滑动功能
有时候我们在使用tableView 的时候不仅仅需要它能够上下滑动,而且还要做到左右滑动的效果.下面就介绍一种比较简单的实现方法.
zmitTableView = [[UITableView alloc] initWithFrame:CGRectMake(0 , 0, kScreenWidth, kScreenHeight)];
zmitTableView = [UIColor whiteColor];
secondTableView = [[UITableView alloc] initWithFrame:CGRectMake(0,100, kScreenWidth, kScreenHeight)];
secondTableViewTableView.backgroundColor = [UIColor whiteColor];
secondTableView.scrollEnabled = NO;
secondTableView.userInteractionEnabled = YES;
[zmitTableView addSubview:secondTableView];
[self.view addSubview: zmitTableView];
首先创建两个tableview ,然后给secondTableView加上拖动手势
UIPanGestureRecognizer *panGestureRecognize = [[UIPanGestureRecognizer alloc] initWithTarget:self action:@selector(handlePan:)];
-(void)handlePan:(UIPanGestureRecognizer *)sender
{
CGPoint translatin = [sender translationInView:secondTableView];
sender.view.center = CGPointMake(sender.view.center.x + translatin.x, sender.view.center.y);
[sender setTranslation:CGPointZero inView:self.YidaScrollView.scrollViewTableView];
}
这样的话就实现了第二个tableView的左右滑动效果,并且不影响第一个tableView的上下滑动.
android 用到一个HorizontalListView 可以实现横向加载数据了这里我们就一起来看一个HorizontalListView横向动态加载数据例子,具体如下所示。这个自定义的控件可以实现横向的动态数据加载,话不多说,下面上代码。(使用方法和普通listview一致)
1、在布局里用HorizontalScrollView包含一个ListView;
2、利用GridView,把它的行数设为1行;
HorizontalListView.java:
package cn.zmit.xianneng.widget;
import java.util.LinkedList;
import java.util.Queue;
import android.content.Context;
import android.database.DataSetObserver;
import android.graphics.Rect;
import android.util.AttributeSet;
import android.view.GestureDetector;
import android.view.GestureDetector.OnGestureListener;
import android.view.MotionEvent;
import android.view.View;
import android.widget.AdapterView;
import android.widget.ListAdapter;
import android.widget.Scroller;
public class HorizontalListView extends AdapterView<ListAdapter> {
public boolean mAlwaysOverrideTouch = true;
protected ListAdapter mAdapter;
private int mLeftViewIndex = -1;
private int mRightViewIndex = 0;
protected int mCurrentX;
protected int mNextX;
private int mMaxX = Integer.MAX_VALUE;
private int mDisplayOffset = 0;
protected Scroller mScroller;
private GestureDetector mGesture;
private Queue<View> mRemovedViewQueue = new LinkedList<View>();
private OnItemSelectedListener mOnItemSelected;
private OnItemClickListener mOnItemClicked;
private OnItemLongClickListener mOnItemLongClicked;
private boolean mDataChanged = false;
public HorizontalListView(Context context, AttributeSet attrs) {
super(context, attrs);
initView();
}
private synchronized void initView() {
mLeftViewIndex = -1;
mRightViewIndex = 0;
mDisplayOffset = 0;
mCurrentX = 0;
mNextX = 0;
mMaxX = Integer.MAX_VALUE;
mScroller = new Scroller(getContext());
mGesture = new GestureDetector(getContext(), mOnGesture);
}
@Override
public void setOnItemSelectedListener(AdapterView.OnItemSelectedListener listener) {
mOnItemSelected = listener;
}
@Override
public void setOnItemClickListener(AdapterView.OnItemClickListener listener){
mOnItemClicked = listener;
}
@Override
public void setOnItemLongClickListener(AdapterView.OnItemLongClickListener listener) {
mOnItemLongClicked = listener;
}
private DataSetObserver mDataObserver = new DataSetObserver() {
@Override
public void onChanged() {
synchronized(HorizontalListView.this){
mDataChanged = true;
}
invalidate();
requestLayout();
}
@Override
public void onInvalidated() {
reset();
invalidate();
requestLayout();
}
};
@Override
public ListAdapter getAdapter() {
return mAdapter;
}
@Override
public View getSelectedView() {
//TODO: implement
return null;
}
@Override
public void setAdapter(ListAdapter adapter) {
if(mAdapter != null) {
mAdapter.unregisterDataSetObserver(mDataObserver);
}
mAdapter = adapter;
mAdapter.registerDataSetObserver(mDataObserver);
reset();
}
private synchronized void reset(){
initView();
removeAllViewsInLayout();
requestLayout();
}
@Override
public void setSelection(int position) {
//TODO: implement
}
private void addAndMeasureChild(final View child, int viewPos) {
LayoutParams params = child.getLayoutParams();
if(params == null) {
params = new LayoutParams(LayoutParams.FILL_PARENT, LayoutParams.FILL_PARENT);
}
addViewInLayout(child, viewPos, params, true);
child.measure(MeasureSpec.makeMeasureSpec(getWidth(), MeasureSpec.AT_MOST),
MeasureSpec.makeMeasureSpec(getHeight(), MeasureSpec.AT_MOST));
}
@Override
protected synchronized void onLayout(boolean changed, int left, int top, int right, int bottom) {
super.onLayout(changed, left, top, right, bottom);
if(mAdapter == null){
return;
}
if(mDataChanged){
int oldCurrentX = mCurrentX;
initView();
removeAllViewsInLayout();
mNextX = oldCurrentX;
mDataChanged = false;
}
if(mScroller.computeScrollOffset()){
int scrollx = mScroller.getCurrX();
mNextX = scrollx;
}
if(mNextX <= 0){
mNextX = 0;
mScroller.forceFinished(true);
}
if(mNextX >= mMaxX) {
mNextX = mMaxX;
mScroller.forceFinished(true);
}
int dx = mCurrentX – mNextX;
removeNonVisibleItems(dx);
fillList(dx);
positionItems(dx);
mCurrentX = mNextX;
if(!mScroller.isFinished()){
post(new Runnable(){
@Override
public void run() {
requestLayout();
}
});
}
}
private void fillList(final int dx) {
int edge = 0;
View child = getChildAt(getChildCount()-1);
if(child != null) {
edge = child.getRight();
}
fillListRight(edge, dx);
edge = 0;
child = getChildAt(0);
if(child != null) {
edge = child.getLeft();
}
fillListLeft(edge, dx);
}
private void fillListRight(int rightEdge, final int dx) {
while(rightEdge + dx < getWidth() && mRightViewIndex < mAdapter.getCount()) {
View child = mAdapter.getView(mRightViewIndex, mRemovedViewQueue.poll(), this);
addAndMeasureChild(child, -1);
rightEdge += child.getMeasuredWidth();
if(mRightViewIndex == mAdapter.getCount()-1) {
mMaxX = mCurrentX + rightEdge – getWidth();
}
if (mMaxX < 0) {
mMaxX = 0;
}
mRightViewIndex++;
}
}
private void fillListLeft(int leftEdge, final int dx) {
while(leftEdge + dx > 0 && mLeftViewIndex >= 0) {
View child = mAdapter.getView(mLeftViewIndex, mRemovedViewQueue.poll(), this);
addAndMeasureChild(child, 0);
leftEdge -= child.getMeasuredWidth();
mLeftViewIndex–;
mDisplayOffset -= child.getMeasuredWidth();
}
}
private void removeNonVisibleItems(final int dx) {
View child = getChildAt(0);
while(child != null && child.getRight() + dx <= 0) {
mDisplayOffset += child.getMeasuredWidth();
mRemovedViewQueue.offer(child);
removeViewInLayout(child);
mLeftViewIndex++;
child = getChildAt(0);
}
child = getChildAt(getChildCount()-1);
while(child != null && child.getLeft() + dx >= getWidth()) {
mRemovedViewQueue.offer(child);
removeViewInLayout(child);
mRightViewIndex–;
child = getChildAt(getChildCount()-1);
}
}
private void positionItems(final int dx) {
if(getChildCount() > 0){
mDisplayOffset += dx;
int left = mDisplayOffset;
for(int i=0;i<getChildCount();i++){
View child = getChildAt(i);
int childWidth = child.getMeasuredWidth();
child.layout(left, 0, left + childWidth, child.getMeasuredHeight());
left += childWidth + child.getPaddingRight();
}
}
}
public synchronized void scrollTo(int x) {
mScroller.startScroll(mNextX, 0, x – mNextX, 0);
requestLayout();
}
@Override
public boolean dispatchTouchEvent(MotionEvent ev) {
boolean handled = super.dispatchTouchEvent(ev);
handled |= mGesture.onTouchEvent(ev);
return handled;
}
protected boolean onFling(MotionEvent e1, MotionEvent e2, float velocityX,
float velocityY) {
synchronized(HorizontalListView.this){
mScroller.fling(mNextX, 0, (int)-velocityX, 0, 0, mMaxX, 0, 0);
}
requestLayout();
return true;
}
protected boolean onDown(MotionEvent e) {
mScroller.forceFinished(true);
return true;
}
private OnGestureListener mOnGesture = new GestureDetector.SimpleOnGestureListener() {
@Override
public boolean onDown(MotionEvent e) {
return HorizontalListView.this.onDown(e);
}
@Override
public boolean onFling(MotionEvent e1, MotionEvent e2, float velocityX,
float velocityY) {
return HorizontalListView.this.onFling(e1, e2, velocityX, velocityY);
}
@Override
public boolean onScroll(MotionEvent e1, MotionEvent e2,
float distanceX, float distanceY) {
synchronized(HorizontalListView.this){
mNextX += (int)distanceX;
}
requestLayout();
return true;
}
@Override
public boolean onSingleTapConfirmed(MotionEvent e) {
for(int i=0;i<getChildCount();i++){
View child = getChildAt(i);
if (isEventWithinView(e, child)) {
if(mOnItemClicked != null){
mOnItemClicked.onItemClick(HorizontalListView.this, child, mLeftViewIndex + 1 + i, mAdapter.getItemId( mLeftViewIndex + 1 + i ));
}
if(mOnItemSelected != null){
mOnItemSelected.onItemSelected(HorizontalListView.this, child, mLeftViewIndex + 1 + i, mAdapter.getItemId( mLeftViewIndex + 1 + i ));
}
break;
}
}
return true;
}
@Override
public void onLongPress(MotionEvent e) {
int childCount = getChildCount();
for (int i = 0; i < childCount; i++) {
View child = getChildAt(i);
if (isEventWithinView(e, child)) {
if (mOnItemLongClicked != null) {
mOnItemLongClicked.onItemLongClick(HorizontalListView.this, child, mLeftViewIndex + 1 + i, mAdapter.getItemId(mLeftViewIndex + 1 + i));
}
break;
}
}
}
private boolean isEventWithinView(MotionEvent e, View child) {
Rect viewRect = new Rect();
int[] childPosition = new int[2];
child.getLocationOnScreen(childPosition);
int left = childPosition[0];
int right = left + child.getWidth();
int top = childPosition[1];
int bottom = top + child.getHeight();
viewRect.set(left, top, right, bottom);
return viewRect.contains((int) e.getRawX(), (int) e.getRawY());
}
};
}
本文章来为各位介绍一篇关于Android标准、固定和沉浸式状态栏的实现例子,希望这个例子能够帮助到各位更深入的理解Android标准、固定和沉浸式状态栏的用法。


沉浸很简单,两句代码搞定:
在Activity中的setContentView(R.layout.activity_main);之前加上:
if (Build.VERSION.SDK_INT >= Build.VERSION_CODES.KITKAT) {
// 透明状态栏
getWindow().addFlags(WindowManager.LayoutParams.FLAG_TRANSLUCENT_STATUS);
// 透明导航栏
getWindow().addFlags(WindowManager.LayoutParams.FLAG_TRANSLUCENT_NAVIGATION);
}
再说固定颜色的设置,需要一个依赖的java文件,先贴出来等会要用。还有一个要注意的地方,这种方式需要在当前activity的布局文件中的最外层加上android:fitsSystemWindows=”true”这个属性。
import android.annotation.SuppressLint;
import android.annotation.TargetApi;
import android.app.Activity;
import android.content.Context;
import android.content.res.Configuration;
import android.content.res.Resources;
import android.content.res.TypedArray;
import android.graphics.drawable.Drawable;
import android.os.Build;
import android.util.DisplayMetrics;
import android.util.TypedValue;
import android.view.Gravity;
import android.view.View;
import android.view.ViewConfiguration;
import android.view.ViewGroup;
import android.view.Window;
import android.view.WindowManager;
import android.widget.FrameLayout.LayoutParams;
import java.lang.reflect.Method;
@SuppressWarnings({ "unchecked", "rawtypes" })
public class SystemStatusManager
{
static
{
if (Build.VERSION.SDK_INT >= Build.VERSION_CODES.KITKAT) {
try {
Class c = Class.forName("android.os.SystemProperties");
Method m = c.getDeclaredMethod("get", String.class);
m.setAccessible(true);
sNavBarOverride = (String) m.invoke(null, "qemu.hw.mainkeys");
} catch (Throwable e) {
sNavBarOverride = null;
}
}
}
/**
* The default system bar tint color value.
*/
public static final int DEFAULT_TINT_COLOR = 0x99000000;
private static String sNavBarOverride;
private final SystemBarConfig mConfig;
private boolean mStatusBarAvailable;
private boolean mNavBarAvailable;
private boolean mStatusBarTintEnabled;
private boolean mNavBarTintEnabled;
private View mStatusBarTintView;
private View mNavBarTintView;
/**
* Constructor. Call this in the host activity onCreate method after its
* content view has been set. You should always create new instances when
* the host activity is recreated.
*
* @param activity The host activity.
*/
@TargetApi(19)
public SystemStatusManager(Activity activity) {
Window win = activity.getWindow();
ViewGroup decorViewGroup = (ViewGroup) win.getDecorView();
if (Build.VERSION.SDK_INT >= Build.VERSION_CODES.KITKAT) {
// check theme attrs
int[] attrs = {android.R.attr.windowTranslucentStatus,
android.R.attr.windowTranslucentNavigation};
TypedArray a = activity.obtainStyledAttributes(attrs);
try {
mStatusBarAvailable = a.getBoolean(0, false);
mNavBarAvailable = a.getBoolean(1, false);
} finally {
a.recycle();
}
// check window flags
WindowManager.LayoutParams winParams = win.getAttributes();
int bits = WindowManager.LayoutParams.FLAG_TRANSLUCENT_STATUS;
if ((winParams.flags & bits) != 0) {
mStatusBarAvailable = true;
}
bits = WindowManager.LayoutParams.FLAG_TRANSLUCENT_NAVIGATION;
if ((winParams.flags & bits) != 0) {
mNavBarAvailable = true;
}
}
mConfig = new SystemBarConfig(activity, mStatusBarAvailable, mNavBarAvailable);
// device might not have virtual navigation keys
if (!mConfig.hasNavigtionBar()) {
mNavBarAvailable = false;
}
if (mStatusBarAvailable) {
setupStatusBarView(activity, decorViewGroup);
}
if (mNavBarAvailable) {
setupNavBarView(activity, decorViewGroup);
}
}
/**
* Enable tinting of the system status bar.
*
* If the platform is running Jelly Bean or earlier, or translucent system
* UI modes have not been enabled in either the theme or via window flags,
* then this method does nothing.
*
* @param enabled True to enable tinting, false to disable it (default).
*/
public void setStatusBarTintEnabled(boolean enabled) {
mStatusBarTintEnabled = enabled;
if (mStatusBarAvailable) {
mStatusBarTintView.setVisibility(enabled ? View.VISIBLE : View.GONE);
}
}
/**
* Enable tinting of the system navigation bar.
*
* If the platform does not have soft navigation keys, is running Jelly Bean
* or earlier, or translucent system UI modes have not been enabled in either
* the theme or via window flags, then this method does nothing.
*
* @param enabled True to enable tinting, false to disable it (default).
*/
public void setNavigationBarTintEnabled(boolean enabled) {
mNavBarTintEnabled = enabled;
if (mNavBarAvailable) {
mNavBarTintView.setVisibility(enabled ? View.VISIBLE : View.GONE);
}
}
/**
* Apply the specified color tint to all system UI bars.
*
* @param color The color of the background tint.
*/
public void setTintColor(int color) {
setStatusBarTintColor(color);
setNavigationBarTintColor(color);
}
/**
* Apply the specified drawable or color resource to all system UI bars.
*
* @param res The identifier of the resource.
*/
public void setTintResource(int res) {
setStatusBarTintResource(res);
setNavigationBarTintResource(res);
}
/**
* Apply the specified drawable to all system UI bars.
*
* @param drawable The drawable to use as the background, or null to remove it.
*/
public void setTintDrawable(Drawable drawable) {
setStatusBarTintDrawable(drawable);
setNavigationBarTintDrawable(drawable);
}
/**
* Apply the specified alpha to all system UI bars.
*
* @param alpha The alpha to use
*/
public void setTintAlpha(float alpha) {
setStatusBarAlpha(alpha);
setNavigationBarAlpha(alpha);
}
/**
* Apply the specified color tint to the system status bar.
*
* @param color The color of the background tint.
*/
public void setStatusBarTintColor(int color) {
if (mStatusBarAvailable) {
mStatusBarTintView.setBackgroundColor(color);
}
}
/**
* Apply the specified drawable or color resource to the system status bar.
*
* @param res The identifier of the resource.
*/
public void setStatusBarTintResource(int res) {
if (mStatusBarAvailable) {
mStatusBarTintView.setBackgroundResource(res);
}
}
/**
* Apply the specified drawable to the system status bar.
*
* @param drawable The drawable to use as the background, or null to remove it.
*/
@SuppressWarnings("deprecation")
public void setStatusBarTintDrawable(Drawable drawable) {
if (mStatusBarAvailable) {
mStatusBarTintView.setBackgroundDrawable(drawable);
}
}
/**
* Apply the specified alpha to the system status bar.
*
* @param alpha The alpha to use
*/
@TargetApi(11)
public void setStatusBarAlpha(float alpha) {
if (mStatusBarAvailable && Build.VERSION.SDK_INT >= Build.VERSION_CODES.HONEYCOMB) {
mStatusBarTintView.setAlpha(alpha);
}
}
/**
* Apply the specified color tint to the system navigation bar.
*
* @param color The color of the background tint.
*/
public void setNavigationBarTintColor(int color) {
if (mNavBarAvailable) {
mNavBarTintView.setBackgroundColor(color);
}
}
/**
* Apply the specified drawable or color resource to the system navigation bar.
*
* @param res The identifier of the resource.
*/
public void setNavigationBarTintResource(int res) {
if (mNavBarAvailable) {
mNavBarTintView.setBackgroundResource(res);
}
}
/**
* Apply the specified drawable to the system navigation bar.
*
* @param drawable The drawable to use as the background, or null to remove it.
*/
@SuppressWarnings("deprecation")
public void setNavigationBarTintDrawable(Drawable drawable) {
if (mNavBarAvailable) {
mNavBarTintView.setBackgroundDrawable(drawable);
}
}
/**
* Apply the specified alpha to the system navigation bar.
*
* @param alpha The alpha to use
*/
@TargetApi(11)
public void setNavigationBarAlpha(float alpha) {
if (mNavBarAvailable && Build.VERSION.SDK_INT >= Build.VERSION_CODES.HONEYCOMB) {
mNavBarTintView.setAlpha(alpha);
}
}
/**
* Get the system bar configuration.
*
* @return The system bar configuration for the current device configuration.
*/
public SystemBarConfig getConfig() {
return mConfig;
}
/**
* Is tinting enabled for the system status bar?
*
* @return True if enabled, False otherwise.
*/
public boolean isStatusBarTintEnabled() {
return mStatusBarTintEnabled;
}
/**
* Is tinting enabled for the system navigation bar?
*
* @return True if enabled, False otherwise.
*/
public boolean isNavBarTintEnabled() {
return mNavBarTintEnabled;
}
private void setupStatusBarView(Context context, ViewGroup decorViewGroup) {
mStatusBarTintView = new View(context);
LayoutParams params = new LayoutParams(LayoutParams.MATCH_PARENT, mConfig.getStatusBarHeight());
params.gravity = Gravity.TOP;
if (mNavBarAvailable && !mConfig.isNavigationAtBottom()) {
params.rightMargin = mConfig.getNavigationBarWidth();
}
mStatusBarTintView.setLayoutParams(params);
mStatusBarTintView.setBackgroundColor(DEFAULT_TINT_COLOR);
mStatusBarTintView.setVisibility(View.GONE);
decorViewGroup.addView(mStatusBarTintView);
}
private void setupNavBarView(Context context, ViewGroup decorViewGroup) {
mNavBarTintView = new View(context);
LayoutParams params;
if (mConfig.isNavigationAtBottom()) {
params = new LayoutParams(LayoutParams.MATCH_PARENT, mConfig.getNavigationBarHeight());
params.gravity = Gravity.BOTTOM;
} else {
params = new LayoutParams(mConfig.getNavigationBarWidth(), LayoutParams.MATCH_PARENT);
params.gravity = Gravity.RIGHT;
}
mNavBarTintView.setLayoutParams(params);
mNavBarTintView.setBackgroundColor(DEFAULT_TINT_COLOR);
mNavBarTintView.setVisibility(View.GONE);
decorViewGroup.addView(mNavBarTintView);
}
/**
* Class which describes system bar sizing and other characteristics for the current
* device configuration.
*
*/
public static class SystemBarConfig {
private static final String STATUS_BAR_HEIGHT_RES_NAME = "status_bar_height";
private static final String NAV_BAR_HEIGHT_RES_NAME = "navigation_bar_height";
private static final String NAV_BAR_HEIGHT_LANDSCAPE_RES_NAME = "navigation_bar_height_landscape";
private static final String NAV_BAR_WIDTH_RES_NAME = "navigation_bar_width";
private static final String SHOW_NAV_BAR_RES_NAME = "config_showNavigationBar";
private final boolean mTranslucentStatusBar;
private final boolean mTranslucentNavBar;
private final int mStatusBarHeight;
private final int mActionBarHeight;
private final boolean mHasNavigationBar;
private final int mNavigationBarHeight;
private final int mNavigationBarWidth;
private final boolean mInPortrait;
private final float mSmallestWidthDp;
private SystemBarConfig(Activity activity, boolean translucentStatusBar, boolean traslucentNavBar) {
Resources res = activity.getResources();
mInPortrait = (res.getConfiguration().orientation == Configuration.ORIENTATION_PORTRAIT);
mSmallestWidthDp = getSmallestWidthDp(activity);
mStatusBarHeight = getInternalDimensionSize(res, STATUS_BAR_HEIGHT_RES_NAME);
mActionBarHeight = getActionBarHeight(activity);
mNavigationBarHeight = getNavigationBarHeight(activity);
mNavigationBarWidth = getNavigationBarWidth(activity);
mHasNavigationBar = (mNavigationBarHeight > 0);
mTranslucentStatusBar = translucentStatusBar;
mTranslucentNavBar = traslucentNavBar;
}
@TargetApi(14)
private int getActionBarHeight(Context context) {
int result = 0;
if (Build.VERSION.SDK_INT >= Build.VERSION_CODES.ICE_CREAM_SANDWICH) {
TypedValue tv = new TypedValue();
context.getTheme().resolveAttribute(android.R.attr.actionBarSize, tv, true);
result = TypedValue.complexToDimensionPixelSize(tv.data, context.getResources().getDisplayMetrics());
}
return result;
}
@TargetApi(14)
private int getNavigationBarHeight(Context context) {
Resources res = context.getResources();
int result = 0;
if (Build.VERSION.SDK_INT >= Build.VERSION_CODES.ICE_CREAM_SANDWICH) {
if (hasNavBar(context)) {
String key;
if (mInPortrait) {
key = NAV_BAR_HEIGHT_RES_NAME;
} else {
key = NAV_BAR_HEIGHT_LANDSCAPE_RES_NAME;
}
return getInternalDimensionSize(res, key);
}
}
return result;
}
@TargetApi(14)
private int getNavigationBarWidth(Context context) {
Resources res = context.getResources();
int result = 0;
if (Build.VERSION.SDK_INT >= Build.VERSION_CODES.ICE_CREAM_SANDWICH) {
if (hasNavBar(context)) {
return getInternalDimensionSize(res, NAV_BAR_WIDTH_RES_NAME);
}
}
return result;
}
@TargetApi(14)
private boolean hasNavBar(Context context) {
Resources res = context.getResources();
int resourceId = res.getIdentifier(SHOW_NAV_BAR_RES_NAME, "bool", "android");
if (resourceId != 0) {
boolean hasNav = res.getBoolean(resourceId);
// check override flag (see static block)
if ("1".equals(sNavBarOverride)) {
hasNav = false;
} else if ("0".equals(sNavBarOverride)) {
hasNav = true;
}
return hasNav;
} else { // fallback
return !ViewConfiguration.get(context).hasPermanentMenuKey();
}
}
private int getInternalDimensionSize(Resources res, String key) {
int result = 0;
int resourceId = res.getIdentifier(key, "dimen", "android");
if (resourceId > 0) {
result = res.getDimensionPixelSize(resourceId);
}
return result;
}
@SuppressLint("NewApi")
private float getSmallestWidthDp(Activity activity) {
DisplayMetrics metrics = new DisplayMetrics();
if (Build.VERSION.SDK_INT >= Build.VERSION_CODES.JELLY_BEAN) {
activity.getWindowManager().getDefaultDisplay().getRealMetrics(metrics);
} else {
activity.getWindowManager().getDefaultDisplay().getMetrics(metrics);
}
float widthDp = metrics.widthPixels / metrics.density;
float heightDp = metrics.heightPixels / metrics.density;
return Math.min(widthDp, heightDp);
}
/**
* Should a navigation bar appear at the bottom of the screen in the current
* device configuration? A navigation bar may appear on the right side of
* the screen in certain configurations.
*
* @return True if navigation should appear at the bottom of the screen, False otherwise.
*/
public boolean isNavigationAtBottom() {
return (mSmallestWidthDp >= 600 || mInPortrait);
}
/**
* Get the height of the system status bar.
*
* @return The height of the status bar (in pixels).
*/
public int getStatusBarHeight() {
return mStatusBarHeight;
}
/**
* Get the height of the action bar.
*
* @return The height of the action bar (in pixels).
*/
public int getActionBarHeight() {
return mActionBarHeight;
}
/**
* Does this device have a system navigation bar?
*
* @return True if this device uses soft key navigation, False otherwise.
*/
public boolean hasNavigtionBar() {
return mHasNavigationBar;
}
/**
* Get the height of the system navigation bar.
*
* @return The height of the navigation bar (in pixels). If the device does not have
* soft navigation keys, this will always return 0.
*/
public int getNavigationBarHeight() {
return mNavigationBarHeight;
}
/**
* Get the width of the system navigation bar when it is placed vertically on the screen.
*
* @return The width of the navigation bar (in pixels). If the device does not have
* soft navigation keys, this will always return 0.
*/
public int getNavigationBarWidth() {
return mNavigationBarWidth;
}
/**
* Get the layout inset for any system UI that appears at the top of the screen.
*
* @param withActionBar True to include the height of the action bar, False otherwise.
* @return The layout inset (in pixels).
*/
public int getPixelInsetTop(boolean withActionBar) {
return (mTranslucentStatusBar ? mStatusBarHeight : 0) + (withActionBar ? mActionBarHeight : 0);
}
/**
* Get the layout inset for any system UI that appears at the bottom of the screen.
*
* @return The layout inset (in pixels).
*/
public int getPixelInsetBottom() {
if (mTranslucentNavBar && isNavigationAtBottom()) {
return mNavigationBarHeight;
} else {
return 0;
}
}
/**
* Get the layout inset for any system UI that appears at the right of the screen.
*
* @return The layout inset (in pixels).
*/
public int getPixelInsetRight() {
if (mTranslucentNavBar && !isNavigationAtBottom()) {
return mNavigationBarWidth;
} else {
return 0;
}
}
}
}
好了,然后我把主activity贴出来吧。
public class MainActivity extends Activity {
@Override
protected void onCreate(Bundle savedInstanceState) {
super.onCreate(savedInstanceState);
setTranslucentStatus();
setContentView(R.layout.activity_main);
}
private void setTranslucentStatus() {
if (Build.VERSION.SDK_INT >= Build.VERSION_CODES.KITKAT) {
// 透明状态栏
getWindow().addFlags(WindowManager.LayoutParams.FLAG_TRANSLUCENT_STATUS);
// 透明导航栏
getWindow().addFlags(WindowManager.LayoutParams.FLAG_TRANSLUCENT_NAVIGATION);
SystemStatusManager tintManager = new SystemStatusManager(this);
tintManager.setStatusBarTintEnabled(true);
tintManager.setStatusBarTintResource(R.color.red);//你要设置的颜色
getWindow().getDecorView().setFitsSystemWindows(true);
}
}
}
好了,这就实现了上面效果图的第二张,固定的状态栏颜色。


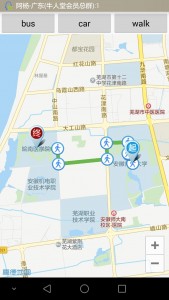
1、获取ListView的LayoutParams:
LayoutParams params= listView.getLayoutParams();
2、为RelativeLayout设置手势监听:
mRlBus.setOnTouchListener(new View.OnTouchListener() {//mRlBus为红框处外层布局
float y=0;//在此处定义一个y,接收Y坐标
@Override
public boolean onTouch(View v, MotionEvent event) {
case MotionEvent.ACTION_DOWN:
y=event.getY();//当手指按在RelativeLayout的某个地方时触发,获取当前纵坐标.
break;
case MotionEvent.ACTION_MOVE:
float x= event.getY()-y;//在此定义一个x,意思为滑动的每一刻,当前时刻的纵坐标减去最初刚按下手指的纵坐标
if(x>0||params.height<=250){//如果手指是向下滑(x=0)或者ListView的高度小于250,
params.height= (int) (params.height-x); //则执行降低或者升高ListView的操作
if(params.height>250){//这个步骤的意思为:假设用户很快速的往上滑,可能造成高度大于250
params.height=250;//如果过高,那么固定为250
}
}
if(params.height<0){//这个步骤的意思为:假设用户很快速的往下滑,可能造成高度小于0,造成ListView选取滑动之前的高度为当前高度
params.height=0;
}
listView.setLayoutParams(params);
break;
case MotionEvent.ACTION_UP:
break;
}
}
});
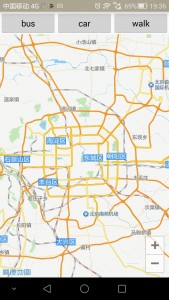 ,默认为北京
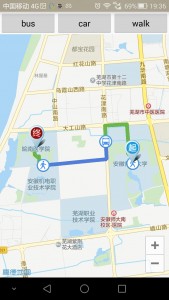

相关文章
- php语言实现redis的客户端与服务端有一些区别了因为前面介绍过服务端了这里我们来介绍客户端吧,希望文章对各位有帮助。 为了更好的了解redis协议,我们用php来实现...2016-11-25
- 有时我们在页面上需要选择数值范围,如购物时选取价格区间,购买主机时自主选取CPU,内存大小配置等,使用直观的滑块条直接选取想要的数值大小即可,无需手动输入数值,操作简单又方便。HTML首先载入jQuery库文件以及jRange相关...2015-03-15
- 本文实例讲述了JS实现的简洁纵向滑动菜单(滑动门)效果。分享给大家供大家参考,具体如下:这是一款纵向布局的CSS+JavaScript滑动门代码,相当简洁的手法来实现,如果对颜色不满意,你可以试着自己修改CSS代码,这个滑动门将每一...2015-10-21
- 这篇文章主要为大家详细介绍了jQuery实现下拉菜单滑动效果,文中示例代码介绍的非常详细,具有一定的参考价值,感兴趣的小伙伴们可以参考一下...2021-08-09
jQuery+slidereveal实现的面板滑动侧边展出效果
我们借助一款jQuery插件:slidereveal.js,可以使用它控制面板左右侧滑出与隐藏等效果,项目地址:https://github.com/nnattawat/slideReveal。如何使用首先在页面中加载jquery库文件和slidereveal.js插件。复制代码 代码如...2015-03-15- 翻板抽奖的实现流程:前端页面提供6个方块,用数字1-6依次表示6个不同的方块,当抽奖者点击6个方块中的某一块时,方块翻转到背面,显示抽奖中奖信息。看似简单的一个操作过程,却包含着WEB技术的很多知识面,所以本文的读者应该熟...2015-10-21
SQLMAP结合Meterpreter实现注入渗透返回shell
sqlmap 是一个自动SQL 射入工具。它是可胜任执行一个广泛的数据库管理系统后端指印, 检索遥远的DBMS 数据库等,下面我们来看一个学习例子。 自己搭建一个PHP+MYSQ...2016-11-25- 复制代码 代码如下: // 第一种写法 $da = date("w"); if( $da == "1" ){ echo "今天是星期一"; }else if( $da == "2" ){ echo "今天是星期二"; }else if( $da == "3" ){ echo "今天是星期三"; }else if( $da == "4"...2013-10-04
- 这篇文章主要介绍了JavaScript 获取滚动条位置并将页面滑动到锚点的的相关资料,帮助大家更好的理解和学习使用JavaScript,感兴趣的朋友可以了解下...2021-02-09
- 这篇文章主要为大家详细介绍了uniapp 实现可以左右滑动导航栏,文中示例代码介绍的非常详细,具有一定的参考价值,感兴趣的小伙伴们可以参考一下...2020-10-21
- js里面设置DOM节点透明度的函数属性:filter= "alpha(opacity=" + value+ ")"(兼容ie)和opacity=value/100(兼容FF和GG)。 先来看看设置透明度的兼容性代码: 复制代码 代码如下: function setOpacity(ele, opacity) { if (...2014-06-07
- 下面小编就为大家带来一篇C#中添加窗口的步骤详解。小编觉得挺不错的,现在就分享给大家,也给大家做个参考。一起跟随小编过来看看吧...2020-06-25
- 这篇文章主要给大家分享的是pygame游戏进行声音添加的方法,这文中介绍的非常详细,具有一定的参考价值,感兴趣的小伙伴们一定要看完!...2021-10-23
- 本文我们需要解决的问题是如何实现Http请求来实现通信,解决Android 2.3 版本以后无法使用Http请求问题,下面请看正文。 Android开发中使用HttpClient来开发Http程序...2016-09-20
- 这篇文章主要为大家分享了js滑动提示效果代码,实现方法简单,感兴趣的小伙伴们可以参考一下...2016-03-12
JQuery EasyUI学习教程之datagrid 添加、修改、删除操作
这篇文章主要介绍了JQuery EasyUI datagrid 添加、修改、删除操作的相关资料,非常不错,具有参考借鉴价值,需要的朋友可以参考下...2016-07-25- 本文给大家介绍利用Vue实现tab导航栏,并且通过flex布局实现左右滑动效果,通过代码给大家分享tab导航栏布局的实现,本文给大家展示了完整代码,需要的朋友参考下吧...2021-06-28
- 复制代码 代码如下:call PROCEDURE_split('分享,代码,片段',',');select * from splittable;复制代码 代码如下:drop PROCEDURE if exists procedure_split;CREATE PROCEDURE `procedure_split`( inputstring varc...2014-05-31
- 美图秀秀是一款不错的图片处理软件了,最近看到很多的朋友喜欢把自己的照片处理成电影字幕效果了,下面我们来看看美图秀秀怎么给照片添加电影字幕吧,希望文章对各位有帮助...2016-09-14
- 一般空间商提供的服务器空间默认PHP 指令 magic_quotes_gpc是on的,也就是打开的。这时候就可以用stripslashes() 函数删除自动添加的反斜杠。用法就是:比如包含字符串的变量是$str,那么就用stripslashes() 函数处理一下...2013-10-04