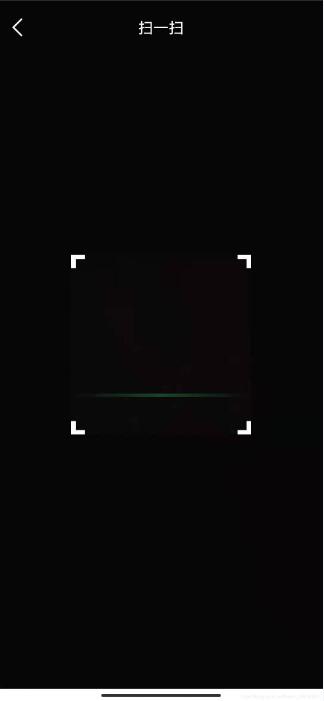
Android实现扫码功能
更新时间:2021年6月1日 00:00 点击:1680
本文实例为大家分享了Android实现扫码功能的具体代码,供大家参考,具体内容如下

1、引入
implementation 'com.journeyapps:zxing-android-embedded:3.5.0'
2、使用:
public void initScan() {
        IntentIntegrator integrator = new IntentIntegrator(this);
        // 设置要扫描的条码类型,ONE_D_CODE_TYPES:一维码,QR_CODE_TYPES-二维码
        integrator.setDesiredBarcodeFormats(IntentIntegrator.QR_CODE_TYPES);
        integrator.setCaptureActivity(ScanActivity.class); //设置打开摄像头的Activity
        integrator.setPrompt(""); //底部的提示文字,设为""可以置空
        integrator.setCameraId(0); //前置或者后置摄像头
        integrator.setBeepEnabled(true); //扫描成功的「哔哔」声,默认开启
        integrator.setBarcodeImageEnabled(true);
        integrator.initiateScan();
    }

    @Override
    protected void onActivityResult(int requestCode, int resultCode, Intent intent) {
        super.onActivityResult(requestCode, resultCode, intent);
        if (requestCode == IntentIntegrator.REQUEST_CODE) {
            IntentResult scanResult = IntentIntegrator.parseActivityResult(requestCode, resultCode, intent);
            if (scanResult != null && scanResult.getContents() != null) {
                String result = scanResult.getContents();
                LogUtil.d("扫码返回: " + result);
                try {
                    JSONObject jsonObject = new JSONObject(result);
                    if (jsonObject.has(Constant.USERPOLICEMENID)) {
                       //TODO  逻辑

                    } else {
                        ToastUtil.showShortToast("未扫描到有效的信息");
                    }
                } catch (Exception e) {
                    ToastUtil.showShortToast("未扫描到有效的信息");
                    e.printStackTrace();
                }
            } else {
                ToastUtil.showShortToast("未扫描到有效的信息");
            }
        }
    }
3、ScanActivity
public class ScanActivity extends BackActivity {

    @BindView(R.id.dbv)
    DecoratedBarcodeView mDbv;
    private CaptureManager captureManager;

    @Override
    protected int getLayoutId() {
        getWindow().setFlags(WindowManager.LayoutParams.FLAG_FULLSCREEN, WindowManager.LayoutParams.FLAG_FULLSCREEN);
        return R.layout.activity_scan;
    }

    @Override
    protected void init() {
        super.init();
        captureManager = new CaptureManager(this, mDbv);
        captureManager.initializeFromIntent(getIntent(), getSavedInstanceState());
        captureManager.decode();
    }

    @Override
    public void onSaveInstanceState(@NotNull Bundle outState, @NotNull PersistableBundle outPersistentState) {
        super.onSaveInstanceState(outState, outPersistentState);
        captureManager.onSaveInstanceState(outState);
    }

    @Override
    public boolean onKeyDown(int keyCode, KeyEvent event) {
        return mDbv.onKeyDown(keyCode, event) || super.onKeyDown(keyCode, event);
    }

    @Override
    protected void onPause() {
        super.onPause();
        captureManager.onPause();
    }

    @Override
    public void onResume() {
        super.onResume();
        captureManager.onResume();
    }

    @Override
    protected void onDestroy() {
        super.onDestroy();
        captureManager.onDestroy();
    }

}
4、布局文件
activity_scan
<?xml version="1.0" encoding="utf-8"?>
<LinearLayout xmlns:android="http://schemas.android.com/apk/res/android"
    xmlns:app="http://schemas.android.com/apk/res-auto"
    xmlns:tools="http://schemas.android.com/tools"
    android:layout_width="match_parent"
    android:layout_height="match_parent"
    android:orientation="vertical"
    tools:context=".ui.main.alarmassistant.ScanActivity">


    <com.journeyapps.barcodescanner.DecoratedBarcodeView
        android:id="@+id/dbv"
        android:layout_width="match_parent"
        android:layout_height="match_parent"
        android:fitsSystemWindows="true"
        app:zxing_framing_rect_height="200dp"
        app:zxing_framing_rect_width="200dp"
        app:zxing_preview_scaling_strategy="fitXY"
        app:zxing_scanner_layout="@layout/view_qr"
        app:zxing_use_texture_view="true" />
</LinearLayout>
view_qr
<?xml version="1.0" encoding="utf-8"?>
<merge xmlns:android="http://schemas.android.com/apk/res/android"
    xmlns:app="http://schemas.android.com/apk/res-auto">

    <com.journeyapps.barcodescanner.BarcodeView
        android:id="@+id/zxing_barcode_surface"
        android:layout_width="match_parent"
        android:layout_height="match_parent"
        app:zxing_framing_rect_height="50dp"
        app:zxing_framing_rect_width="250dp" />

    <com.x.x.widget.QrView
        android:id="@+id/zxing_viewfinder_view"
        android:layout_width="match_parent"
        android:layout_height="match_parent"
        app:zxing_possible_result_points="@color/color_white"
        app:zxing_result_view="@color/zxing_custom_result_view"
        app:zxing_viewfinder_laser="@color/color_white"
        app:zxing_viewfinder_mask="@color/zxing_custom_viewfinder_mask" />

    <TextView
        android:id="@+id/zxing_status_view"
        android:layout_width="wrap_content"
        android:layout_height="wrap_content"
        android:layout_gravity="bottom|center_horizontal"
        android:layout_marginBottom="30dp"
        android:background="@color/zxing_transparent"
        android:text="@string/zxing_msg_default_status"
        android:textColor="@color/zxing_status_text" />

    <com.x.common.widget.MyActionBar
        android:id="@+id/action_bar"
        android:layout_width="match_parent"
        android:layout_height="wrap_content"
        app:dark_mode="true"
        app:title="扫一扫" />
</merge>
5、
/**
 * 自定义扫描界面
 */

public class QrView extends ViewfinderView {

    public int laserLinePosition = 0;
    public float[] position = new float[]{0f, 0.5f, 1f};
    public int[] colors = new int[]{0x0027B14D, 0xff27B14D, 0x0027B14D};
    public LinearGradient linearGradient;
    private int ScreenRate;

    public QrView(Context context, AttributeSet attrs) {
        super(context, attrs);
        float density = context.getResources().getDisplayMetrics().density;
        ScreenRate = (int) (15 * density);
    }

    @Override
    public void onDraw(Canvas canvas) {
        int CORNER_WIDTH = 15;
        refreshSizes();

        if (framingRect == null || previewFramingRect == null) {
            return;
        }

        Rect frame = framingRect;
        Rect previewFrame = previewFramingRect;

        int width = canvas.getWidth();
        int height = canvas.getHeight();
        //绘制4个角

        paint.setColor(getResources().getColor(R.color.color_white));//定义画笔的颜色
        canvas.drawRect(frame.left, frame.top, frame.left + ScreenRate, frame.top + CORNER_WIDTH, paint);
        canvas.drawRect(frame.left, frame.top, frame.left + CORNER_WIDTH, frame.top + ScreenRate, paint);

        canvas.drawRect(frame.right - ScreenRate, frame.top, frame.right, frame.top + CORNER_WIDTH, paint);
        canvas.drawRect(frame.right - CORNER_WIDTH, frame.top, frame.right, frame.top + ScreenRate, paint);

        canvas.drawRect(frame.left, frame.bottom - CORNER_WIDTH, frame.left + ScreenRate, frame.bottom, paint);
        canvas.drawRect(frame.left, frame.bottom - ScreenRate, frame.left + CORNER_WIDTH, frame.bottom, paint);

        canvas.drawRect(frame.right - ScreenRate, frame.bottom - CORNER_WIDTH, frame.right, frame.bottom, paint);
        canvas.drawRect(frame.right - CORNER_WIDTH, frame.bottom - ScreenRate, frame.right, frame.bottom, paint);

        // 画出外部(即构图矩形之外)变暗
        paint.setColor(resultBitmap != null ? resultColor : maskColor);
        canvas.drawRect(0, 0, width, frame.top, paint);
        canvas.drawRect(0, frame.top, frame.left, frame.bottom, paint);
        canvas.drawRect(frame.right, frame.top, width, frame.bottom, paint);
        canvas.drawRect(0, frame.bottom, width, height, paint);

        if (resultBitmap != null) {
            // Draw the opaque result bitmap over the scanning rectangle
            paint.setAlpha(CURRENT_POINT_OPACITY);
            canvas.drawBitmap(resultBitmap, null, frame, paint);
        } else {

            laserLinePosition = laserLinePosition + 8;
            if (laserLinePosition >= frame.height()) {
                laserLinePosition = 0;
            }
            linearGradient = new LinearGradient(frame.left + 1, frame.top + laserLinePosition, frame.right - 1, frame.top + 10 + laserLinePosition, colors, position, Shader.TileMode.CLAMP);
            // Draw a red "laser scanner" line through the middle to show decoding is active

            paint.setShader(linearGradient);
            //绘制扫描线
            canvas.drawRect(frame.left + 1, frame.top + laserLinePosition, frame.right - 1, frame.top + 10 + laserLinePosition, paint);
            paint.setShader(null);
            float scaleX = frame.width() / (float) previewFrame.width();
            float scaleY = frame.height() / (float) previewFrame.height();

            List<ResultPoint> currentPossible = possibleResultPoints;
            List<ResultPoint> currentLast = lastPossibleResultPoints;
            int frameLeft = frame.left;
            int frameTop = frame.top;
            if (currentPossible.isEmpty()) {
                lastPossibleResultPoints = null;
            } else {
                possibleResultPoints = new ArrayList<>(5);
                lastPossibleResultPoints = currentPossible;
                paint.setAlpha(CURRENT_POINT_OPACITY);
                paint.setColor(resultPointColor);
                for (ResultPoint point : currentPossible) {
                    canvas.drawCircle(frameLeft + (int) (point.getX() * scaleX), frameTop + (int) (point.getY() * scaleY), POINT_SIZE, paint);
                }
            }
            if (currentLast != null) {
                paint.setAlpha(CURRENT_POINT_OPACITY / 2);
                paint.setColor(resultPointColor);
                float radius = POINT_SIZE / 2.0f;
                for (ResultPoint point : currentLast) {
                    canvas.drawCircle(frameLeft + (int) (point.getX() * scaleX), frameTop + (int) (point.getY() * scaleY), radius, paint);
                }
            }
            postInvalidateDelayed(16, frame.left, frame.top, frame.right, frame.bottom);
        }
    }
}
以上就是本文的全部内容,希望对大家的学习有所帮助,也希望大家多多支持猪先飞。
下一篇: Flutter 开发一个登录页面
相关文章
- 下面我们来看一篇关于Android子控件超出父控件的范围显示出来方法,希望这篇文章能够帮助到各位朋友,有碰到此问题的朋友可以进来看看哦。 <RelativeLayout xmlns:an...2016-10-02
Android开发中findViewById()函数用法与简化
findViewById方法在android开发中是获取页面控件的值了,有没有发现我们一个页面控件多了会反复研究写findViewById呢,下面我们一起来看它的简化方法。 Android中Fin...2016-09-20- 如果我们的项目需要做来电及短信的功能,那么我们就得在Android模拟器开发这些功能,本来就来告诉我们如何在Android模拟器上模拟来电及来短信的功能。 在Android模拟...2016-09-20
- 夜神android模拟器如何设置代理呢?对于这个问题其实操作起来是非常的简单,下面小编来为各位详细介绍夜神android模拟器设置代理的方法,希望例子能够帮助到各位。 app...2016-09-20
- 为了增强android应用的用户体验,我们可以在一些Button按钮上自定义动态的设置一些样式,比如交互时改变字体、颜色、背景图等。 今天来看一个通过重写Button来动态实...2016-09-20
- 如果我们要在Android应用APP中加载html5页面,我们可以使用WebView,本文我们分享两个WebView加载html5页面实例应用。 实例一:WebView加载html5实现炫酷引导页面大多...2016-09-20
- 深入理解Android中View和ViewGroup从组成架构上看,似乎ViewGroup在View之上,View需要继承ViewGroup,但实际上不是这样的。View是基类,ViewGroup是它的子类。本教程我们深...2016-09-20
- 下面我们来看一篇关于Android自定义WebView网络视频播放控件开发例子,这个文章写得非常的不错下面给各位共享一下吧。 因为业务需要,以下代码均以Youtube网站在线视...2016-10-02
- java开发的Android应用,性能一直是一个大问题,,或许是Java语言本身比较消耗内存。本文我们来谈谈Android 性能优化之MemoryFile文件读写。 Android匿名共享内存对外A...2016-09-20
- TextView默认是横着显示了,今天我们一起来看看Android设置TextView竖着显示如何来实现吧,今天我们就一起来看看操作细节,具体的如下所示。 在开发Android程序的时候,...2016-10-02
android.os.BinderProxy cannot be cast to com解决办法
本文章来给大家介绍关于android.os.BinderProxy cannot be cast to com解决办法,希望此文章对各位有帮助呀。 Android在绑定服务的时候出现java.lang.ClassCastExc...2016-09-20- 为公司系统业务需要,这几天了解了一下微信和支付宝扫码支付的接口,并用c#实现了微信和支付宝扫码支付的功能。需要的朋友跟随小编一起看看吧...2020-06-25
- 这篇文章主要介绍了Android 实现钉钉自动打卡功能的步骤,帮助大家更好的理解和学习使用Android,感兴趣的朋友可以了解下...2021-03-15
- 下面我们来看一篇关于Android 开发之布局细节对比:RTL模式 ,希望这篇文章对各位同学会带来帮助,具体的细节如下介绍。 前言 讲真,好久没写博客了,2016都过了一半了,赶紧...2016-10-02
- 首先如果要在程序中使用sdcard进行存储,我们必须要在AndroidManifset.xml文件进行下面的权限设置: 在AndroidManifest.xml中加入访问SDCard的权限如下: <!--...2016-09-20
- 下面来给各位简单的介绍一下关于Android开发之PhoneGap打包及错误解决办法,希望碰到此类问题的同学可进入参考一下哦。 在我安装、配置好PhoneGap项目的所有依赖...2016-09-20
用Intel HAXM给Android模拟器Emulator加速
Android 模拟器 Emulator 速度真心不给力,, 现在我们来介绍使用 Intel HAXM 技术为 Android 模拟器加速,使模拟器运行度与真机比肩。 周末试玩了一下在Eclipse中使...2016-09-20- 在安卓开发时我碰到一个问题就是需要实现全屏,但又需要我们来判断出用户是使用了全屏或非全屏了,下面我分别找了两段代码,大家可参考。 先来看一个android屏幕全屏实...2016-09-20
Android开发中布局中的onClick简单完成多控件时的监听的利与弊
本文章来为各位介绍一篇关于Android开发中布局中的onClick简单完成多控件时的监听的利与弊的例子,希望这个例子能够帮助到各位朋友. 首先在一个控件加上这么一句:and...2016-09-20Ubuntu 系统下安装Android开发环境 Android Studio 1.0 步骤
Android Studio 是一个Android开发环境,基于IntelliJ IDEA. 类似 Eclipse ADT,Android Studio 提供了集成的 Android 开发工具用于开发和调试,可以在Linux,Mac OS X,Window...2016-09-20
