HttpClient实现表单提交上传文件
更新时间:2022年8月14日 15:54 点击:311 作者:小明同学12138
本文实例为大家分享了HttpClient实现表单提交上传文件的具体代码,供大家参考,具体内容如下
需求:如何利用HttpClient,发起post请求,模拟表单提交,在后端上传文件?
上传文件接口:
/**
     * 文件上传测试接口
     * @return
     */
    @PostMapping("/upload")
    public Object uploadFileTest(@RequestParam("file") MultipartFile file, @RequestParam("file_name") String file_name, @RequestParam("file_code") String file_code) {
        System.out.println(file_name+","+file_code);
        return "OK";
    }
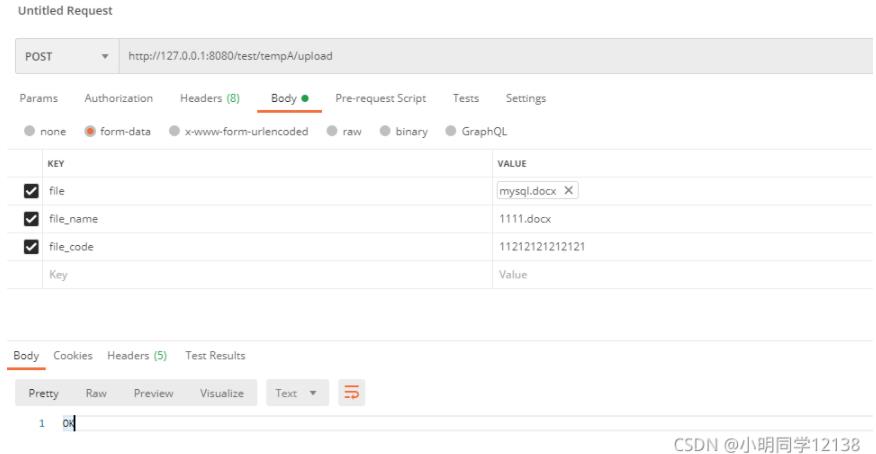
启动后,可以通过postman进行调用,最后打印OK,表示接口可以调用通
然后就是正式编码环节了
首先引入需要的包:
<dependency>
   <groupId>org.apache.httpcomponents</groupId>
   <artifactId>httpmime</artifactId>
   <version>4.5.3</version>
</dependency>
编写main方法,直接发起调用
 public static String httpClientUploadFile(String url, File file) {
        CloseableHttpClient httpClient = HttpClients.createDefault();
        String result = "";
        //每个post参数之间的分隔。随意设定,只要不会和其他的字符串重复即可。
        String boundary = "--------------4585696313564699";
        try {
            //文件名
            String fileName = file.getName();
            HttpPost httpPost = new HttpPost(url);
            //设置请求头
            httpPost.setHeader("Content-Type", "multipart/form-data; boundary="+boundary);

            //HttpEntity builder
            MultipartEntityBuilder builder = MultipartEntityBuilder.create();
            //字符编码
            builder.setCharset(Charset.forName("UTF-8"));
            //模拟浏览器
            builder.setMode(HttpMultipartMode.BROWSER_COMPATIBLE);
            builder.setContentType(ContentType.MULTIPART_FORM_DATA);
            //boundary
            builder.setBoundary(boundary);
            //multipart/form-data
            builder.addPart("file", new FileBody(file, ContentType.DEFAULT_BINARY));
            // binary
            //builder.addBinaryBody("name=\"file\"; filename=\"mysql.docx\"", new FileInputStream(file), ContentType.MULTIPART_FORM_DATA, fileName);// 文件流
            //其他参数
            //builder.addTextBody("file_name", fileName, ContentType.create("text/plain", Consts.UTF_8));
            builder.addTextBody("file_name", fileName, ContentType.MULTIPART_FORM_DATA);
            builder.addTextBody("file_code", "111111", ContentType.MULTIPART_FORM_DATA);
            //HttpEntity
            HttpEntity entity = builder.build();
            httpPost.setEntity(entity);
            // 执行提交
            HttpResponse response = httpClient.execute(httpPost);
            //响应
            HttpEntity responseEntity = response.getEntity();
            if (responseEntity != null) {
                // 将响应内容转换为字符串
                result = EntityUtils.toString(responseEntity, Charset.forName("UTF-8"));
            }
        } catch (IOException e) {
            e.printStackTrace();
        } catch (Exception e) {
            e.printStackTrace();
        } finally {
            try {
                httpClient.close();
            } catch (IOException e) {
                e.printStackTrace();
            }
        }
        System.out.println("result" + result);
        return result;
    }

    //main 方法
    public static void main(String[] args) {
        httpClientUploadFile("http://127.0.0.1:8080/test/tempA/upload",new File("e:/tmp/mysql.docx"));
    }
最后返回OK,调用成功
以上就是本文的全部内容,希望对大家的学习有所帮助,也希望大家多多支持猪先飞。
原文出处:https://blog.csdn.net/qq_28534469/article/details/120327851
相关文章
php无刷新利用iframe实现页面无刷新上传文件(1/2)
利用form表单的target属性和iframe 一、上传文件的一个php教程方法。 该方法接受一个$file参数,该参数为从客户端获取的$_files变量,返回重新命名后的文件名,如果上传失...2016-11-25- artDialog是一个基于javascript编写的对话框组件,它拥有精致的界面与友好的接口。本文给大家介绍JS中artdialog弹出框控件之提交表单思路详解,对本文感兴趣的朋友一起学习吧...2016-04-19
- 有时候我们为了省事就操作键盘组合键去代替使用鼠标,我们今天就使用JQuery实现Ctrl+Enter提交表单。我们发帖时,在内容输入框中输入完内容后,可以点击“提交”按钮来发表内容。可是,如果你够“懒”,你可以不用动鼠标,只需按...2015-10-23
- 为了网站的安全性,很多朋友都把密码设的比较复杂,但是如何密码不能明显示,不知道输的是对是错,为了安全起见可以把密码显示的,那么基于js代码如何实现的呢?下面通过本文给大家介绍JavaScript实现表单密码的隐藏和显示,需要的朋友参考下...2016-03-03
- 分享给大家php判断上传文件类型的方法,大家一起学习学习。/** * 读取文件前几个字节 判断文件类型 * @return String */ function checkTitle($filename){ $file=fopen($filename, "rb"); $bin=fread($file, 2); /...2015-10-21
- 这篇文章主要为大家详细解析了BootStrap栅格系统、表单样式与按钮样式源码,具有一定的参考价值,感兴趣的小伙伴们可以参考一下...2017-01-23
C#中HttpWebRequest、WebClient、HttpClient的使用详解
这篇文章主要介绍了C#中HttpWebRequest、WebClient、HttpClient的使用详解,文中通过示例代码介绍的非常详细,对大家的学习或者工作具有一定的参考学习价值,需要的朋友们下面随着小编来一起学习学习吧...2020-06-25- 这篇文章主要介绍了react使用antd表单赋值,用于修改弹框的操作,具有很好的参考价值,希望对大家有所帮助。一起跟随小编过来看看吧...2020-10-29
- 在html表单提交中method请求Get和Post区别其实很显示的,get提交会是url形式的并且数据量不能太多,而post数据是在浏览器url看不到的并且可以是大数据量而且get安全性非...2016-09-20
- 这篇文章主要介绍了Vue使用formData格式类型上传文件的示例代码,代码简单易懂,对大家的学习或工作具有一定的参考借鉴价值,需要的朋友可以参考下...2021-09-04
- 这篇文章主要介绍了微信小程序 PHP后端form表单提交实例详解的相关资料,需要的朋友可以参考下...2017-01-16
- 这篇文章主要介绍了解决antd Form 表单校验方法无响应的问题,具有很好的参考价值,希望对大家有所帮助。一起跟随小编过来看看吧...2020-10-28
基于Bootstrap实现Material Design风格表单插件 附源码下载
Jquery Material Form Plugin是一款基于Bootstrap的Material Design风格的jQuery表单插件。这篇文章主要介绍了基于Bootstrap的Material Design风格表单插件附源码下载,感兴趣的朋友参考下...2016-04-19详解.NET Core 使用HttpClient SSL请求出错的解决办法
这篇文章主要介绍了.NET Core 使用HttpClient SSL请求出错的解决办法,小编觉得挺不错的,现在分享给大家,也给大家做个参考。一起跟随小编过来看看吧...2021-09-22- 本篇文章主要介绍了vue2 中如何实现动态表单增删改查实例,小编觉得挺不错的,现在分享给大家,也给大家做个参考。一起跟随小编过来看看吧 ...2017-06-15
java HttpClient传输json格式的参数实例讲解
这篇文章主要介绍了java HttpClient传输json格式的参数实例讲解,具有很好的参考价值,希望对大家有所帮助。一起跟随小编过来看看吧...2021-01-22- 本文介绍在表单提交之前修改提交的值的方法,希望给需要的朋友一些帮助。...2016-04-17
- 一聚教程网 从零开始的html教程(7),html表单的基础,零基础也能轻松学会html,希望大家喜欢 一、html的表单 表单负责网页中用户输入数据采集的功能,利用<form>标签来定...2016-12-31
- 下面小编就为大家分享一篇c# FTP上传文件的实例代码,超简单哦~希望对大家有所帮助。一起跟随小编过来看看吧,...2020-06-25
基于bootstrap插件实现autocomplete自动完成表单
这篇文章主要介绍了基于bootstrap插件实现autocomplete自动完成表单的相关资料,感兴趣的朋友可以参考一下...2016-05-09