vue实现登录验证码
更新时间:2021年8月13日 12:00 点击:2472
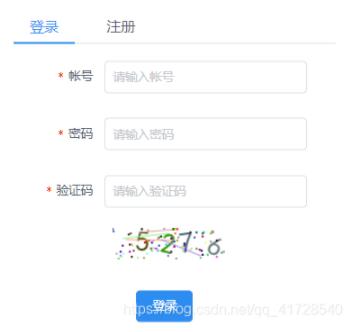
本文实例为大家分享了vue实现登录验证码的具体代码,供大家参考,具体内容如下
先来demo效果图
canvas验证码组件(可直接复制,无需改动)
<template>
    <div class="s-canvas">
        <canvas id="s-canvas" :width="contentWidth" :height="contentHeight"></canvas>
    </div>
</template>

<script>
    export default {
        name: "SIdentify",
        props: {
            identifyCode: {
                type: String,
                default: '1234'
            },
            fontSizeMin: {
                type: Number,
                default: 25
            },
            fontSizeMax: {
                type: Number,
                default: 30
            },
            backgroundColorMin: {
                type: Number,
                default: 255
            },
            backgroundColorMax: {
                type: Number,
                default: 255
            },
            colorMin: {
                type: Number,
                default: 0
            },
            colorMax: {
                type: Number,
                default: 160
            },
            lineColorMin: {
                type: Number,
                default: 100
            },lineColorMax: {
                type: Number,
                default: 255
            },
            dotColorMin: {
                type: Number,
                default: 0
            },
            dotColorMax: {
                type: Number,
                default: 255
            },
            contentWidth: {
                type: Number,
                default: 112
            },
            contentHeight: {
                type: Number,
                default: 31
            }
        },
        methods: {
            // 生成一个随机数
            randomNum(min, max) {
                return Math.floor(Math.random() * (max - min) + min)
            },
            // 生成一个随机的颜色
            randomColor(min, max) {
                let r = this.randomNum(min, max)
                let g = this.randomNum(min, max)
                let b = this.randomNum(min, max)
                return 'rgb(' + r + ',' + g + ',' + b + ')'
            },
            drawPic() {
                let canvas = document.getElementById('s-canvas')
                let ctx = canvas.getContext('2d')
                ctx.textBaseline = 'bottom'
                // 绘制背景
                ctx.fillStyle = this.randomColor(this.backgroundColorMin, this.backgroundColorMax)
                ctx.fillRect(0, 0, this.contentWidth, this.contentHeight)
                // 绘制文字
                for (let i = 0; i < this.identifyCode.length; i++) {
                    this.drawText(ctx, this.identifyCode[i], i)
                }
                this.drawLine(ctx)
                this.drawDot(ctx)
            },
            drawText(ctx, txt, i) {
                ctx.fillStyle = this.randomColor(this.colorMin, this.colorMax)
                ctx.font = this.randomNum(this.fontSizeMin, this.fontSizeMax) + 'px SimHei'
                let x = (i + 1) * (this.contentWidth / (this.identifyCode.length + 1))
                let y = this.randomNum(this.fontSizeMax, this.contentHeight - 5)
                var deg = this.randomNum(-45, 45)
                // 修改坐标原点和旋转角度
                ctx.translate(x, y)
                ctx.rotate(deg * Math.PI / 180)
                ctx.fillText(txt, 0, 0)
                // 恢复坐标原点和旋转角度
                ctx.rotate(-deg * Math.PI / 180)
                ctx.translate(-x, -y)
            },
            drawLine(ctx) {
                // 绘制干扰线
                for (let i = 0; i < 5; i++) {
                    ctx.strokeStyle = this.randomColor(this.lineColorMin, this.lineColorMax)
                    ctx.beginPath()
                    ctx.moveTo(this.randomNum(0, this.contentWidth), this.randomNum(0, this.contentHeight))
                    ctx.lineTo(this.randomNum(0, this.contentWidth), this.randomNum(0, this.contentHeight))
                    ctx.stroke()
                }
            },
            drawDot(ctx) {
                // 绘制干扰点
                for (let i = 0; i < 80; i++) {
                    ctx.fillStyle = this.randomColor(0, 255)
                    ctx.beginPath()
                    ctx.arc(this.randomNum(0, this.contentWidth), this.randomNum(0, this.contentHeight), 1, 0, 2 * Math.PI)
                    ctx.fill()
                }
            }
        },
        watch: {
            identifyCode() {
                this.drawPic()
            }
        },
        mounted() {
            this.drawPic()
        }
    }
</script>

<style scoped>
    .s-canvas {
        height: 38px;

    }
    .s-canvas canvas{
        margin-top: 1px;
        margin-left: 8px;
    }
</style>
login页面的html部分,按需改动

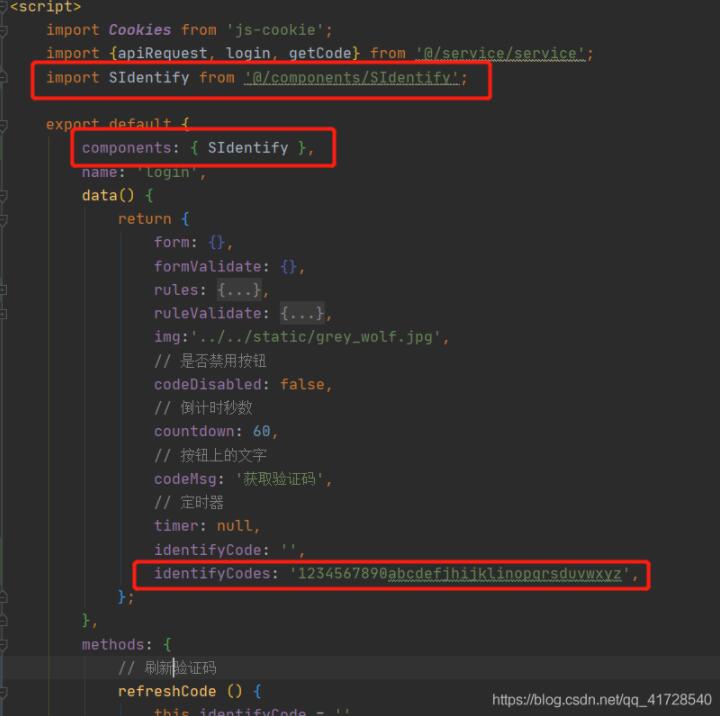
引入验证码组件
methods方法

login页面完整代码
<style lang="less">
    @import './login.less';
</style>

<template>
    <div class="login" @keydown.enter="handleSubmit">
        <div class="login-con">
            <Card :bordered="false" style="width: 350px;height: 380px">
                <div class="form-con">
                    <Tabs value="name1" :animated="false">
                        <TabPane label="登录" name="name1">
                            <Form ref="loginForm" :model="form" :rules="rules" :label-width="90" inline>
                                <FormItem label="帐号" prop="username">
                                    <Input v-model="form.username" placeholder="请输入帐号" ref="input" clearable style="width: 200px"/>
                                </FormItem>
                                <FormItem label="密码" prop="password">
                                    <Input v-model="form.password" placeholder="请输入密码" clearable  style="width: 200px"/>
                                </FormItem>
                                <FormItem label="验证码" prop="verificationCode">
                                    <Input v-model="form.verificationCode" placeholder="请输入验证码" clearable  style="width: 200px"/>
                                    <div @click="refreshCode" style="margin-top: 20px">
                                        <!--验证码组件-->
                                        <s-identify :identifyCode="identifyCode"></s-identify>
                                    </div>
                                </FormItem>
                                <div style="text-align: center">
                                    <Button @click="handleSubmit" type="primary" style="margin-right: 20px">登录</Button>
                                </div>
                            </Form>
                        </TabPane>
                        <TabPane label="注册" name="name2">
                            <Form ref="formValidate" :model="formValidate" :rules="ruleValidate" :label-width="90" inline>
                                <FormItem label="帐号" prop="username">
                                    <Input v-model="formValidate.username" placeholder="请输入帐号" ref="input" clearable style="width: 200px"/>
                                </FormItem>
                                <FormItem label="密码" prop="password">
                                    <Input v-model="formValidate.password" placeholder="请输入密码" clearable  style="width: 200px"/>
                                </FormItem>
                                <FormItem label="手机号" prop="mobile">
                                    <Input v-model="formValidate.mobile" placeholder="请输入手机号" clearable style="width: 200px" />
                                </FormItem>
                                <FormItem label="短信验证码" prop="header">
                                    <Input v-model="formValidate.header" placeholder="短信验证码" style="width: 200px"/>
                                    <Button type="primary" size="small" @click="getCode" :disabled="codeDisabled">{{codeMsg}}</Button>
                                </FormItem>
                                <div style="text-align: center">
                                    <Button type="primary" @click="register('formValidate')">注册</Button>
                                </div>
                            </Form>
                        </TabPane>
                    </Tabs>
                </div>
            </Card>
        </div>
        <!--<vue-particles
                color="#FF4500"
                :particleOpacity="0.7"
                :particlesNumber="300"
                shapeType="circle"
                :particleSize="7"
                linesColor="#00FF00"
                :linesWidth="2"
                :lineLinked="true"
                :lineOpacity="0.4"
                :linesDistance="150"
                :moveSpeed="4"
                :hoverEffect="true"
                hoverMode="grab"
                :clickEffect="true"
                clickMode="repulse"
        >
        </vue-particles>-->
    </div>
</template>

<script>
    import Cookies from 'js-cookie';
    import {apiRequest, login, getCode} from '@/service/service';
    import SIdentify from '@/components/SIdentify';

    export default {
        components: { SIdentify },
        name: 'login',
        data() {
            return {
                form: {},
                formValidate: {},
                rules: {
                    username: [
                        {required: true, message: '登录用户名不能为空', trigger: 'blur'}
                    ],
                    password: [
                        {required: true, message: '登录密码不能为空', trigger: 'blur'}
                    ],
                    verificationCode: [
                        {required: true, message: '验证码不能为空', trigger: 'blur'}
                    ]
                },
                ruleValidate: {
                    username: [
                        {required: true, message: '登录用户名不能为空', trigger: 'blur'}
                    ],
                    password: [
                        {required: true, message: '登录密码不能为空', trigger: 'blur'}
                    ],
                    mobile: [
                        {required: true, message: '手机号不能为空', trigger: 'blur'}
                    ],
                    header: [
                        {required: true, message: '短信验证码不能为空', trigger: 'blur'}
                    ]
                },
                img:'../../static/grey_wolf.jpg',
                // 是否禁用按钮
                codeDisabled: false,
                // 倒计时秒数
                countdown: 60,
                // 按钮上的文字
                codeMsg: '获取验证码',
                // 定时器
                timer: null,
                identifyCode: '',
                identifyCodes: '1234567890abcdefjhijklinopqrsduvwxyz',
            };
        },
        methods: {
            // 刷新验证码
            refreshCode () {
                this.identifyCode = ''
                this.makeCode(this.identifyCodes,4);
            },
            makeCode (o,l) {
                for (let i = 0; i < l; i++) {
                    this.identifyCode += this.identifyCodes[this.randomNum(0, this.identifyCodes.length)]
                }
            },
            randomNum (min, max) {
                return Math.floor(Math.random() * (max - min) + min)
            },
            // 获取短信验证码
            getCode() {
                // 验证码60秒倒计时
                if (!this.timer) {
                    this.getValidStr();
                    this.timer = setInterval(this.getValidStr, 1000);
                }
                apiRequest(this, getCode(this.form.mobile), response => {
                });
            },
            getValidStr(){
                if (this.countdown > 0 && this.countdown <= 60) {
                    this.countdown--;
                    if (this.countdown !== 0) {
                        this.codeMsg = "重新发送(" + this.countdown + ")";
                        this.codeDisabled = true;
                    } else {
                        clearInterval(this.timer);
                        this.codeMsg = "获取验证码";
                        this.countdown = 60;
                        this.timer = null;
                        this.codeDisabled = false;
                    }
                }
            },
            handleSubmit() {
                this.$refs.loginForm.validate((valid) => {
                    if (valid) {
                        //登录密码做MD5加密
                        let password = this.$copyto.md5(this.form.password);
                        //登录接口请求
                        apiRequest(this, login(this.form.username, password), response => {
                            this.$store.commit('setUserInfo', response.data);
                            Cookies.set('user', this.form.username);
                            Cookies.set('userId', response.data.id);
                            localStorage.sessionId = response.sessionId
                            this.$store.commit('setAvator', '');
                            if (this.form.userName === 'admin') {
                                Cookies.set('access', 0);
                            } else {
                                Cookies.set('access', 1);
                            }
                            this.$router.push({name: 'home_index'});
                        });
                    }
                });
            },
            register() {
            }
        },
        mounted () {
            // 初始化验证码
            this.identifyCode = ''
            this.makeCode(this.identifyCodes, 4)
        },

    };
</script>

<style>

</style>
以上就是本文的全部内容,希望对大家的学习有所帮助,也希望大家多多支持猪先飞。
上一篇: vue实现物流时间轴效果
下一篇: JavaScript实现更换头像功能
相关文章
- 这篇文章主要介绍了vue中activated的用法,帮助大家更好的理解和使用vue框架,感兴趣的朋友可以了解下...2021-01-03
基于vue-simple-uploader封装文件分片上传、秒传及断点续传的全局上传插件功能
这篇文章主要介绍了基于vue-simple-uploader封装文件分片上传、秒传及断点续传的全局上传插件,本文给大家介绍的非常详细,对大家的学习或工作具有一定的参考借鉴价值,需要的朋友可以参考下...2021-02-23Antd-vue Table组件添加Click事件,实现点击某行数据教程
这篇文章主要介绍了Antd-vue Table组件添加Click事件,实现点击某行数据教程,具有很好的参考价值,希望对大家有所帮助。一起跟随小编过来看看吧...2020-11-17- 在很多网站用户先访问一个要登录的页面,但当时没有登录后来登录了,等待用户登录成功之后肯定希望返回到上次访问的页面,下面我就来给大家介绍登录后跳转回原来要访问的页...2016-11-25
- 这篇文章主要介绍了Vue基于localStorage存储信息代码实例,文中通过示例代码介绍的非常详细,对大家的学习或者工作具有一定的参考学习价值,需要的朋友可以参考下...2020-11-16
- 这篇文章主要介绍了vue 实现动态路由的方法,文中示例代码非常详细,帮助大家更好的理解和学习,感兴趣的朋友可以了解下...2020-07-06
- 这篇文章主要介绍了vue 监听 Treeselect 选择项的改变操作,具有很好的参考价值,希望对大家有所帮助。一起跟随小编过来看看吧...2020-09-01
- 这篇文章主要介绍了Vue组件跨层级获取组件操作,具有很好的参考价值,希望对大家有所帮助。一起跟随小编过来看看吧...2020-07-28
- 这篇文章主要介绍了vue 获取到数据但却渲染不到页面上的解决方法,文中通过示例代码介绍的非常详细,对大家的学习或者工作具有一定的参考学习价值,需要的朋友们下面随着小编来一起学习学习吧...2020-11-19
antdesign-vue结合sortablejs实现两个table相互拖拽排序功能
这篇文章主要介绍了antdesign-vue结合sortablejs实现两个table相互拖拽排序功能,本文通过实例图文相结合给大家介绍的非常详细,对大家的学习或工作具有一定的参考借鉴价值,需要的朋友可以参考下...2021-01-09vuejs element table 表格添加行,修改,单独删除行,批量删除行操作
这篇文章主要介绍了vuejs element table 表格添加行,修改,单独删除行,批量删除行操作,具有很好的参考价值,希望对大家有所帮助。一起跟随小编过来看看吧...2020-07-18- 本文章完美的利用了php的curl功能实现模拟登录discuz以及模拟发帖,本教程供参考学习哦。 代码如下 复制代码 <?php $discuz_url = ‘ht...2016-11-25
- 这篇文章主要介绍了vue treeselect获取当前选中项的label实例,具有很好的参考价值,希望对大家有所帮助。一起跟随小编过来看看吧...2020-09-01
- 这篇文章主要给大家介绍了关于Vue中slot-scope的深入理解,这个教程非常适合初学者,文中通过示例代码介绍的非常详细,对大家的学习或者工作具有一定的参考学习价值,需要的朋友们下面随着小编来一起学习学习吧...2021-04-17
- 最常见的多环境配置,就是开发环境配置,和生产环境配置,本文主要介绍了vue项目多环境配置的实现,感兴趣的可以了解一下...2021-07-20
vue项目页面嵌入代码块vue-prism-editor的实现
这篇文章主要介绍了vue项目页面嵌入代码块vue-prism-editor的实现,本文给大家介绍的非常详细,对大家的学习或工作具有一定的参考借鉴价值,需要的朋友可以参考下...2020-10-30- 这篇文章主要介绍了Vue 3.0 中 jsx 语法使用,帮助大家更好的理解和使用vue框架,感兴趣的朋友可以了解下...2020-11-13
- 最近想自学PHP ,做了个验证码,但不知道怎么搞的,总出现一个如下图的小红叉,但验证码就是显示不出来,原因如下 未修改之前,出现如下错误; (1)修改步骤如下,原因如下,原因是apache权限没开, (2)点击打开php.int., 搜索extension=ph...2013-10-04
vue Treeselect下拉树只能选择第N级元素实现代码
这篇文章主要介绍了vue Treeselect下拉树只能选择第N级元素实现代码,具有很好的参考价值,希望对大家有所帮助。一起跟随小编过来看看吧...2020-09-01解决vue的router组件component在import时不能使用变量问题
这篇文章主要介绍了解决vue的router组件component在import时不能使用变量问题,具有很好的参考价值,希望对大家有所帮助。一起跟随小编过来看看吧...2020-07-27