Python实现对照片中的人脸进行颜值预测
一、所需工具
**Python版本:**3.5.4(64bit)
二、相关模块
- opencv_python模块
- sklearn模块
- numpy模块
- dlib模块
- 一些Python自带的模块。
三、环境搭建
(1)安装相应版本的Python并添加到环境变量中;
(2)pip安装相关模块中提到的模块。
例如:

若pip安装报错,请自行到:
http://www.lfd.uci.edu/~gohlke/pythonlibs/
下载pip安装报错模块的whl文件,并使用:
pip install whl文件路径+whl文件名安装。
例如:
(已在相关文件中提供了编译好的用于dlib库安装的whl文件——>因为这个库最不好装)

参考文献链接
【1】xxxPh.D.的博客
http://www.learnopencv.com/computer-vision-for-predicting-facial-attractiveness/
【2】华南理工大学某实验室
http://www.hcii-lab.net/data/SCUT-FBP/EN/introduce.html
四、主要思路
(1)模型训练
用了PCA算法对特征进行了压缩降维;
然后用随机森林训练模型。
数据源于网络,据说数据“发源地”就是华南理工大学某实验室,因此我在参考文献上才加上了这个实验室的链接。
(2)提取人脸关键点
主要使用了dlib库。
使用官方提供的模型构建特征提取器。
(3)特征生成
完全参考了xxxPh.D.的博客。
(4)颜值预测
利用之前的数据和模型进行颜值预测。
使用方式
有特殊疾病者请慎重尝试预测自己的颜值,本人不对颜值预测的结果和带来的所有负面影响负责!!!
言归正传。
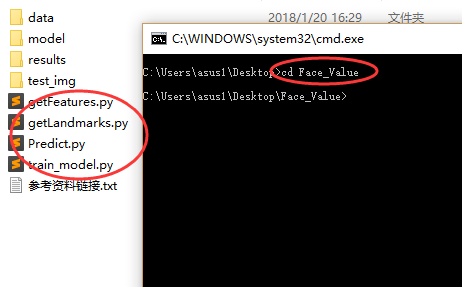
环境搭建完成后,解压相关文件中的Face_Value.rar文件,cmd窗口切换到解压后的*.py文件所在目录。
例如:
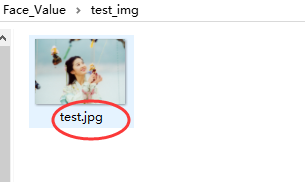
打开test_img文件夹,将需要预测颜值的照片放入并重命名为test.jpg。
例如:
若嫌麻烦或者有其他需求,请自行修改:
getLandmarks.py文件中第13行。
最后依次运行:
train_model.py(想直接用我模型的请忽略此步)
# 模型训练脚本
import numpy as np
from sklearn import decomposition
from sklearn.ensemble import RandomForestRegressor
from sklearn.externals import joblib


# 特征和对应的分数路径
features_path = './data/features_ALL.txt'
ratings_path = './data/ratings.txt'

# 载入数据
# 共500组数据
# 其中前480组数据作为训练集,后20组数据作为测试集
features = np.loadtxt(features_path, delimiter=',')
features_train = features[0: -20]
features_test = features[-20: ]
ratings = np.loadtxt(ratings_path, delimiter=',')
ratings_train = ratings[0: -20]
ratings_test = ratings[-20: ]

# 训练模型
# 这里用PCA算法对特征进行了压缩和降维。
# 降维之后特征变成了20维,也就是说特征一共有500行,每行是一个人的特征向量,每个特征向量有20个元素。
# 用随机森林训练模型
pca = decomposition.PCA(n_components=20)
pca.fit(features_train)
features_train = pca.transform(features_train)
features_test = pca.transform(features_test)
regr = RandomForestRegressor(n_estimators=50, max_depth=None, min_samples_split=10, random_state=0)
regr = regr.fit(features_train, ratings_train)
joblib.dump(regr, './model/face_rating.pkl', compress=1)

# 训练完之后提示训练结束
print('Generate Model Successfully!')
getLandmarks.py
# 人脸关键点提取脚本
import cv2
import dlib
import numpy


# 模型路径
PREDICTOR_PATH = './model/shape_predictor_68_face_landmarks.dat'
# 使用dlib自带的frontal_face_detector作为人脸提取器
detector = dlib.get_frontal_face_detector()
# 使用官方提供的模型构建特征提取器
predictor = dlib.shape_predictor(PREDICTOR_PATH)
face_img = cv2.imread("test_img/test.jpg")
# 使用detector进行人脸检测,rects为返回的结果
rects = detector(face_img, 1)
# 如果检测到人脸
if len(rects) >= 1:
	print("{} faces detected".format(len(rects)))
else:
	print('No faces detected')
	exit()
with open('./results/landmarks.txt', 'w') as f:
	f.truncate()
	for faces in range(len(rects)):
		# 使用predictor进行人脸关键点识别
		landmarks = numpy.matrix([[p.x, p.y] for p in predictor(face_img, rects[faces]).parts()])
		face_img = face_img.copy()
		# 使用enumerate函数遍历序列中的元素以及它们的下标
		for idx, point in enumerate(landmarks):
			pos = (point[0, 0], point[0, 1])
			f.write(str(point[0, 0]))
			f.write(',')
			f.write(str(point[0, 1]))
			f.write(',')
		f.write('\n')
	f.close()
# 成功后提示
print('Get landmarks successfully')
getFeatures.py
# 特征生成脚本
# 具体原理请参见参考论文
import math
import numpy
import itertools


def facialRatio(points):
	x1 = points[0]
	y1 = points[1]
	x2 = points[2]
	y2 = points[3]
	x3 = points[4]
	y3 = points[5]
	x4 = points[6]
	y4 = points[7]
	dist1 = math.sqrt((x1-x2)**2 + (y1-y2)**2)
	dist2 = math.sqrt((x3-x4)**2 + (y3-y4)**2)
	ratio = dist1/dist2
	return ratio


def generateFeatures(pointIndices1, pointIndices2, pointIndices3, pointIndices4, allLandmarkCoordinates):
	size = allLandmarkCoordinates.shape
	if len(size) > 1:
		allFeatures = numpy.zeros((size[0], len(pointIndices1)))
		for x in range(0, size[0]):
			landmarkCoordinates = allLandmarkCoordinates[x, :]
			ratios = []
			for i in range(0, len(pointIndices1)):
				x1 = landmarkCoordinates[2*(pointIndices1[i]-1)]
				y1 = landmarkCoordinates[2*pointIndices1[i] - 1]
				x2 = landmarkCoordinates[2*(pointIndices2[i]-1)]
				y2 = landmarkCoordinates[2*pointIndices2[i] - 1]
				x3 = landmarkCoordinates[2*(pointIndices3[i]-1)]
				y3 = landmarkCoordinates[2*pointIndices3[i] - 1]
				x4 = landmarkCoordinates[2*(pointIndices4[i]-1)]
				y4 = landmarkCoordinates[2*pointIndices4[i] - 1]
				points = [x1, y1, x2, y2, x3, y3, x4, y4]
				ratios.append(facialRatio(points))
			allFeatures[x, :] = numpy.asarray(ratios)
	else:
		allFeatures = numpy.zeros((1, len(pointIndices1)))
		landmarkCoordinates = allLandmarkCoordinates
		ratios = []
		for i in range(0, len(pointIndices1)):
			x1 = landmarkCoordinates[2*(pointIndices1[i]-1)]
			y1 = landmarkCoordinates[2*pointIndices1[i] - 1]
			x2 = landmarkCoordinates[2*(pointIndices2[i]-1)]
			y2 = landmarkCoordinates[2*pointIndices2[i] - 1]
			x3 = landmarkCoordinates[2*(pointIndices3[i]-1)]
			y3 = landmarkCoordinates[2*pointIndices3[i] - 1]
			x4 = landmarkCoordinates[2*(pointIndices4[i]-1)]
			y4 = landmarkCoordinates[2*pointIndices4[i] - 1]
			points = [x1, y1, x2, y2, x3, y3, x4, y4]
			ratios.append(facialRatio(points))
		allFeatures[0, :] = numpy.asarray(ratios)
	return allFeatures


def generateAllFeatures(allLandmarkCoordinates):
	a = [18, 22, 23, 27, 37, 40, 43, 46, 28, 32, 34, 36, 5, 9, 13, 49, 55, 52, 58]
	combinations = itertools.combinations(a, 4)
	i = 0
	pointIndices1 = []
	pointIndices2 = []
	pointIndices3 = []
	pointIndices4 = []
	for combination in combinations:
		pointIndices1.append(combination[0])
		pointIndices2.append(combination[1])
		pointIndices3.append(combination[2])
		pointIndices4.append(combination[3])
		i = i+1
		pointIndices1.append(combination[0])
		pointIndices2.append(combination[2])
		pointIndices3.append(combination[1])
		pointIndices4.append(combination[3])
		i = i+1
		pointIndices1.append(combination[0])
		pointIndices2.append(combination[3])
		pointIndices3.append(combination[1])
		pointIndices4.append(combination[2])
		i = i+1
	return generateFeatures(pointIndices1, pointIndices2, pointIndices3, pointIndices4, allLandmarkCoordinates)


landmarks = numpy.loadtxt("./results/landmarks.txt", delimiter=',', usecols=range(136))
featuresALL = generateAllFeatures(landmarks)
numpy.savetxt("./results/my_features.txt", featuresALL, delimiter=',', fmt = '%.04f')
print("Generate Feature Successfully!")
Predict.py
# 颜值预测脚本
from sklearn.externals import joblib
import numpy as np
from sklearn import decomposition


pre_model = joblib.load('./model/face_rating.pkl')
features = np.loadtxt('./data/features_ALL.txt', delimiter=',')
my_features = np.loadtxt('./results/my_features.txt', delimiter=',')
pca = decomposition.PCA(n_components=20)
pca.fit(features)
predictions = []
if len(my_features.shape) > 1:
	for i in range(len(my_features)):
		feature = my_features[i, :]
		feature_transfer = pca.transform(feature.reshape(1, -1))
		predictions.append(pre_model.predict(feature_transfer))
	print('照片中的人颜值得分依次为(满分为5分):')
	k = 1
	for pre in predictions:
		print('第%d个人:' % k, end='')
		print(str(pre)+'分')
		k += 1
else:
	feature = my_features
	feature_transfer = pca.transform(feature.reshape(1, -1))
	predictions.append(pre_model.predict(feature_transfer))
	print('照片中的人颜值得分为(满分为5分):')
	k = 1
	for pre in predictions:
		print(str(pre)+'分')
		k += 1
到此这篇关于Python实现对照片中的人脸进行颜值预测的文章就介绍到这了,更多相关Python对人脸进行颜值预测内容请搜索猪先飞以前的文章或继续浏览下面的相关文章希望大家以后多多支持猪先飞!
相关文章
- 这篇文章主要介绍了python-opencv-画外接矩形框的实例代码,代码简单易懂,对大家的学习或工作具有一定的参考借鉴价值,需要的朋友可以参考下...2021-09-04
Python astype(np.float)函数使用方法解析
这篇文章主要介绍了Python astype(np.float)函数使用方法解析,文中通过示例代码介绍的非常详细,对大家的学习或者工作具有一定的参考学习价值,需要的朋友可以参考下...2020-06-08- 2022虎年新年即将来临,小编为大家带来了一个利用Python编写的虎年烟花特效,堪称全网最绚烂,文中的示例代码简洁易懂,感兴趣的同学可以动手试一试...2022-02-14
- 在本篇文章里小编给大家分享的是一篇关于python中numpy.empty()函数实例讲解内容,对此有兴趣的朋友们可以学习下。...2021-02-06
python-for x in range的用法(注意要点、细节)
这篇文章主要介绍了python-for x in range的用法,具有很好的参考价值,希望对大家有所帮助。一起跟随小编过来看看吧...2021-05-10- 这篇文章主要介绍了Python 图片转数组,二进制互转操作,具有很好的参考价值,希望对大家有所帮助。一起跟随小编过来看看吧...2021-03-09
- 这篇文章主要介绍了Python中的imread()函数用法说明,具有很好的参考价值,希望对大家有所帮助。一起跟随小编过来看看吧...2021-03-16
- 这篇文章主要介绍了python如何实现b站直播自动发送弹幕,帮助大家更好的理解和学习使用python,感兴趣的朋友可以了解下...2021-02-20
python Matplotlib基础--如何添加文本和标注
这篇文章主要介绍了python Matplotlib基础--如何添加文本和标注,帮助大家更好的利用Matplotlib绘制图表,感兴趣的朋友可以了解下...2021-01-26- 这篇文章主要介绍了解决python 使用openpyxl读写大文件的坑,具有很好的参考价值,希望对大家有所帮助。一起跟随小编过来看看吧...2021-03-13
- 今天小编就为大家分享一篇python 计算方位角实例(根据两点的坐标计算),具有很好的参考价值,希望对大家有所帮助。一起跟随小编过来看看吧...2020-04-27
- 这篇文章主要为大家详细介绍了python实现双色球随机选号,文中示例代码介绍的非常详细,具有一定的参考价值,感兴趣的小伙伴们可以参考一下...2020-05-02
- 在本篇文章里小编给大家整理的是一篇关于python中使用np.delete()的实例方法,对此有兴趣的朋友们可以学习参考下。...2021-02-01
- 这篇文章主要介绍了使用Python的pencolor函数实现渐变色功能,本文通过实例代码给大家介绍的非常详细,对大家的学习或工作具有一定的参考借鉴价值,需要的朋友可以参考下...2021-03-09
- 这篇文章主要介绍了python自动化办公操作PPT的实现,文中通过示例代码介绍的非常详细,对大家的学习或者工作具有一定的参考学习价值,需要的朋友们下面随着小编来一起学习学习吧...2021-02-05
Python getsizeof()和getsize()区分详解
这篇文章主要介绍了Python getsizeof()和getsize()区分详解,文中通过示例代码介绍的非常详细,对大家的学习或者工作具有一定的参考学习价值,需要的朋友们下面随着小编来一起学习学习吧...2020-11-20- 这篇文章主要介绍了解决python 两个时间戳相减出现结果错误的问题,具有很好的参考价值,希望对大家有所帮助。一起跟随小编过来看看吧...2021-03-12
- 这篇文章主要为大家详细介绍了python实现学生通讯录管理系统,文中示例代码介绍的非常详细,具有一定的参考价值,感兴趣的小伙伴们可以参考一下...2021-02-25
- 这篇文章主要介绍了PyTorch一小时掌握之迁移学习篇,本文给大家介绍的非常详细,对大家的学习或工作具有一定的参考借鉴价值,需要的朋友可以参考下...2021-09-08
- 这篇文章主要介绍了Python绘制的爱心树与表白代码,本文通过实例代码给大家介绍的非常详细,对大家的学习或工作具有一定的参考借鉴价值,需要的朋友可以参考下...2021-04-06