Android View高仿猎豹清理大师自定义开口圆环比例进度
一、概述
Android下的 猎豹清理大师的内存开口圆环比例进度 挺不错的,于是反编译了猎豹清理大师的app,原来是有两张图,于是想了一下思路,利用上下两张图,旋转上面张图以及使用 PorterDuffXfermode 来设置合适的渲染模式,就可以达到效果。下面看看咱们的效果吧
二、效果图

三、Xfermode渲染模式简介:
xfermode影响在Canvas已经有的图像上绘制新的颜色的方式
* 正常的情况下,在图像上绘制新的形状,如果新的Paint不是透明的,那么会遮挡下面的颜色.
* 如果新的Paint是透明的,那么会被染成下面的颜色
下面的Xfermode子类可以改变这种行为:
AvoidXfermode 指定了一个颜色和容差,强制Paint避免在它上面绘图(或者只在它上面绘图)。
PixelXorXfermode 当覆盖已有的颜色时,应用一个简单的像素XOR操作。
PorterDuffXfermode 这是一个非常强大的转换模式,使用它,可以使用图像合成的16条Porter-Duff规则的任意一条来控制Paint如何与已有的Canvas图像进行交互。
这里不得不提到那个经典的图:

上面的16种模式的说明如下:
从上面我们可以看到PorterDuff.Mode为枚举类,一共有16个枚举值:
1.PorterDuff.Mode.CLEAR
所绘制不会提交到画布上。
2.PorterDuff.Mode.SRC
显示上层绘制图片
3.PorterDuff.Mode.DST
显示下层绘制图片
4.PorterDuff.Mode.SRC_OVER
正常绘制显示,上下层绘制叠盖。
5.PorterDuff.Mode.DST_OVER
上下层都显示。下层居上显示。
6.PorterDuff.Mode.SRC_IN
取两层绘制交集。显示上层。
7.PorterDuff.Mode.DST_IN
取两层绘制交集。显示下层。
8.PorterDuff.Mode.SRC_OUT
取上层绘制非交集部分。
9.PorterDuff.Mode.DST_OUT
取下层绘制非交集部分。
10.PorterDuff.Mode.SRC_ATOP
取下层非交集部分与上层交集部分
11.PorterDuff.Mode.DST_ATOP
取上层非交集部分与下层交集部分
12.PorterDuff.Mode.XOR
异或:去除两图层交集部分
13.PorterDuff.Mode.DARKEN
取两图层全部区域,交集部分颜色加深
14.PorterDuff.Mode.LIGHTEN
取两图层全部,点亮交集部分颜色
15.PorterDuff.Mode.MULTIPLY
取两图层交集部分叠加后颜色
16.PorterDuff.Mode.SCREEN
取两图层全部区域,交集部分变为透明色
四、自定义开口圆环View的实现
1、初始化绘制所需的画笔,字体颜色、大小等变量
public XCArcProgressBar(Context context, AttributeSet attrs,
        int defStyleAttr) {
    super(context, attrs, defStyleAttr);
    // TODO Auto-generated constructor stub


    degrees =  0;
    paint  =  new Paint();
    //从attrs.xml中获取自定义属性和默认值
    TypedArray typedArray  = context.obtainStyledAttributes(attrs, R.styleable.XCRoundProgressBar);
    textColor  =typedArray.getColor(R.styleable.XCRoundProgressBar_textColor, Color.RED);
    textSize = typedArray.getDimension(R.styleable.XCRoundProgressBar_textSize, 15);
    max = typedArray.getInteger(R.styleable.XCRoundProgressBar_max, 100);
    isDisplayText  =typedArray.getBoolean(R.styleable.XCRoundProgressBar_textIsDisplayable, true);
    typedArray.recycle();

}
2、在onDraw()中绘制出来
在onDraw()方法中利用PorterDuffXfermode渲染模式绘制两张开口圆环Bitmap,并计算前景图的旋转角度,从而达到效果图效果。
首先先绘制底部背景图,然后绘制进度前景图,最后利用PorterDuffXfermode的渲染模式和旋转角度比例来进行前景图和背景图的遮罩处理。
@Override
protected void onDraw(Canvas canvas) {
    // TODO Auto-generated method stub
    super.onDraw(canvas);
    int width = getWidth();
    int height = getHeight();
    int centerX = getWidth() / 2;// 获取中心点X坐标
    int centerY = getHeight() / 2;// 获取中心点Y坐标
    Bitmap bitmap = Bitmap.createBitmap(width, height, Config.ARGB_8888);
    Canvas can = new Canvas(bitmap);
    // 绘制底部背景图
    bmpTemp = Utils.decodeCustomRes(getContext(), R.drawable.arc_bg);
    float dstWidth = (float) width;
    float dstHeight = (float) height;
    int srcWidth = bmpTemp.getWidth();
    int srcHeight = bmpTemp.getHeight();
    can.setDrawFilter(new PaintFlagsDrawFilter(0, Paint.ANTI_ALIAS_FLAG
            | Paint.FILTER_BITMAP_FLAG));// 抗锯齿
    Bitmap bmpBg = Bitmap.createScaledBitmap(bmpTemp, width, height, true);
    can.drawBitmap(bmpBg, 0, 0, null);
    // 绘制进度前景图
    Matrix matrixProgress = new Matrix();
    matrixProgress.postScale(dstWidth / srcWidth, dstHeight / srcWidth);
    bmpTemp = Utils.decodeCustomRes(getContext(), R.drawable.arc_progress);
    Bitmap bmpProgress = Bitmap.createBitmap(bmpTemp, 0, 0, srcWidth,
            srcHeight, matrixProgress, true);
    degrees = progress * 270 / max - 270;
    //遮罩处理前景图和背景图
    can.save();
    can.rotate(degrees, centerX, centerY);
    paint.setAntiAlias(true);
    paint.setXfermode(new PorterDuffXfermode(Mode.SRC_ATOP));
    can.drawBitmap(bmpProgress, 0, 0, paint);
    can.restore();

    if ((-degrees) >= 85) {
        int posX = 0;
        int posY = 0;
        if ((-degrees) >= 270) {
            posX = 0;
            posY = 0;
        } else if ((-degrees) >= 225) {
            posX = centerX / 2;
            posY = 0;
        } else if ((-degrees) >= 180) {
            posX = centerX;
            posY = 0;
        } else if ((-degrees) >= 135) {
            posX = centerX;
            posY = 0;
        } else if ((-degrees) >= 85) {
            posX = centerX;
            posY = centerY;
        }

        if ((-degrees) >= 225) {
            can.save();
            Bitmap dst = bitmap
                    .createBitmap(bitmap, 0, 0, centerX, centerX);
            paint.setAntiAlias(true);
            paint.setXfermode(new PorterDuffXfermode(Mode.SRC_ATOP));
            Bitmap src = bmpBg.createBitmap(bmpBg, 0, 0, centerX, centerX);
            can.drawBitmap(src, 0, 0, paint);
            can.restore();
            can.save();
            dst = bitmap.createBitmap(bitmap, centerX, 0, centerX, height);
            paint.setAntiAlias(true);
            paint.setXfermode(new PorterDuffXfermode(Mode.SRC_ATOP));
            src = bmpBg.createBitmap(bmpBg, centerX, 0, centerX, height);
            can.drawBitmap(src, centerX, 0, paint);
            can.restore();
        } else {
            can.save();
            Bitmap dst = bitmap.createBitmap(bitmap, posX, posY, width
                    - posX, height - posY);
            paint.setAntiAlias(true);
            paint.setXfermode(new PorterDuffXfermode(Mode.SRC_ATOP));
            Bitmap src = bmpBg.createBitmap(bmpBg, posX, posY,
                    width - posX, height - posY);
            can.drawBitmap(src, posX, posY, paint);
            can.restore();
        }
    }
    //绘制遮罩层位图
    canvas.drawBitmap(bitmap, 0, 0, null);

    // 画中间进度百分比字符串
    paint.reset();
    paint.setStrokeWidth(0);
    paint.setColor(textColor);
    paint.setTextSize(textSize);
    paint.setTypeface(Typeface.DEFAULT_BOLD);
    int percent = (int) (((float) progress / (float) max) * 100);// 计算百分比
    float textWidth = paint.measureText(percent + "%");// 测量字体宽度,需要居中显示
    if (isDisplayText && percent != 0) {
        canvas.drawText(percent + "%", centerX - textWidth / 2, centerX
                + textSize / 2 - 25, paint);
    }
    //画底部开口处标题文字
    paint.setTextSize(textSize/2);
    textWidth = paint.measureText(title);
    canvas.drawText(title, centerX-textWidth/2, height-textSize/2, paint);
}
3、设置比例进度的同步接口方法,主要供刷新进度比例用。
/**
 * 设置进度,此为线程安全控件,由于考虑多线的问题,需要同步
 * 刷新界面调用postInvalidate()能在非UI线程刷新
 * @author caizhiming
 */
public synchronized void setProgress(int progress) {
    if(progress < 0){
        throw new IllegalArgumentException("progress must more than 0");
    }
    if(progress > max){
        this.progress = progress;
    }
    if(progress <= max){
        this.progress = progress;
        postInvalidate();
    }
}
最后,自己试玩着感觉良好,可以直接应用到实际项目中
先分析内存缓存是如何实现的,开始进入正题。
BitmapUtils内存缓存的核心类LruMemoryCache,LruMemoryCache代码和v4包的LruCache一样,只是加了一个存储超期的处理,这里分析LruCache源码。LRU即Least Recently Used,近期最少使用算法。也就是当内存缓存达到设定的最大值时将内存缓存中近期最少使用的对象移除,有效的避免了OOM的出现。
讲到LruCache不得不提一下LinkedHashMap,因为LruCache中Lru算法的实现就是通过LinkedHashMap来实现的。LinkedHashMap继承于HashMap,它使用了一个双向链表来存储Map中的Entry顺序关系,这种顺序有两种,一种是LRU顺序,一种是插入顺序,这可以由其构造函数public LinkedHashMap(int initialCapacity,float loadFactor, boolean accessOrder)指定。所以,对于get、put、remove等操作,LinkedHashMap除了要做HashMap做的事情,还做些调整Entry顺序链表的工作。LruCache中将LinkedHashMap的顺序设置为LRU顺序来实现LRU缓存,每次调用get(也就是从内存缓存中取图片),则将该对象移到链表的尾端。调用put插入新的对象也是存储在链表尾端,这样当内存缓存达到设定的最大值时,将链表头部的对象(近期最少用到的)移除。关于LinkedHashMap详解请前往http://www.111cn.net/jsp/J2ME/94612.htm。
下面看下LruCache的源码,我都注释的很详细了。
/*
 * Copyright (C) 2011 The Android Open Source Project
 *
 * Licensed under the Apache License, Version 2.0 (the "License");
 * you may not use this file except in compliance with the License.
 * You may obtain a copy of the License at
 *
 *      http://www.apache.org/licenses/LICENSE-2.0
 *
 * Unless required by applicable law or agreed to in writing, software
 * distributed under the License is distributed on an "AS IS" BASIS,
 * WITHOUT WARRANTIES OR CONDITIONS OF ANY KIND, either express or implied.
 * See the License for the specific language governing permissions and
 * limitations under the License.
 */
package android.support.v4.util;
import java.util.LinkedHashMap;
import java.util.Map;
/**
 * Static library version of {@link android.util.LruCache}. Used to write apps
 * that run on API levels prior to 12. When running on API level 12 or above,
 * this implementation is still used; it does not try to switch to the
 * framework's implementation. See the framework SDK documentation for a class
 * overview.
 */
public class LruCache<K, V> {
    private final LinkedHashMap<K, V> map;
    /** Size of this cache in units. Not necessarily the number of elements. */
    private int size;    //当前cache的大小
    private int maxSize; //cache最大大小
    private int putCount;       //put的次数
    private int createCount;    //create的次数
    private int evictionCount;  //回收的次数
    private int hitCount;       //命中的次数
    private int missCount;      //未命中次数
    /**
     * @param maxSize for caches that do not override {@link #sizeOf}, this is
     *     the maximum number of entries in the cache. For all other caches,
     *     this is the maximum sum of the sizes of the entries in this cache.
     */
    public LruCache(int maxSize) {
        if (maxSize <= 0) {
            throw new IllegalArgumentException("maxSize <= 0");
        }
        this.maxSize = maxSize;
        //将LinkedHashMap的accessOrder设置为true来实现LRU
        this.map = new LinkedHashMap<K, V>(0, 0.75f, true);
    }
    /**
     * Returns the value for {@code key} if it exists in the cache or can be
     * created by {@code #create}. If a value was returned, it is moved to the
     * head of the queue. This returns null if a value is not cached and cannot
     * be created.
     * 通过key获取相应的item,或者创建返回相应的item。相应的item会移动到队列的尾部,
     * 如果item的value没有被cache或者不能被创建,则返回null。
     */
    public final V get(K key) {
        if (key == null) {
            throw new NullPointerException("key == null");
        }
        V mapValue;
        synchronized (this) {
            mapValue = map.get(key);
            if (mapValue != null) {
                //mapValue不为空表示命中,hitCount+1并返回mapValue对象
                hitCount++;
                return mapValue;
            }
            missCount++;  //未命中
        }
        /*
         * Attempt to create a value. This may take a long time, and the map
         * may be different when create() returns. If a conflicting value was
         * added to the map while create() was working, we leave that value in
         * the map and release the created value.
         * 如果未命中,则试图创建一个对象,这里create方法返回null,并没有实现创建对象的方法
         * 如果需要事项创建对象的方法可以重写create方法。因为图片缓存时内存缓存没有命中会去
         * 文件缓存中去取或者从网络下载,所以并不需要创建。
         */
        V createdValue = create(key);
        if (createdValue == null) {
            return null;
        }
        //假如创建了新的对象,则继续往下执行
        synchronized (this) {
            createCount++;
            //将createdValue加入到map中,并且将原来键为key的对象保存到mapValue
            mapValue = map.put(key, createdValue);
            if (mapValue != null) {
                // There was a conflict so undo that last put
                //如果mapValue不为空,则撤销上一步的put操作。
                map.put(key, mapValue);
            } else {
                //加入新创建的对象之后需要重新计算size大小
                size += safeSizeOf(key, createdValue);
            }
        }
        if (mapValue != null) {
            entryRemoved(false, key, createdValue, mapValue);
            return mapValue;
        } else {
            //每次新加入对象都需要调用trimToSize方法看是否需要回收
            trimToSize(maxSize);
            return createdValue;
        }
    }
    /**
     * Caches {@code value} for {@code key}. The value is moved to the head of
     * the queue.
     *
     * @return the previous value mapped by {@code key}.
     */
    public final V put(K key, V value) {
        if (key == null || value == null) {
            throw new NullPointerException("key == null || value == null");
        }
        V previous;
        synchronized (this) {
            putCount++;
            size += safeSizeOf(key, value);  //size加上预put对象的大小
            previous = map.put(key, value);
            if (previous != null) {
                //如果之前存在键为key的对象,则size应该减去原来对象的大小
                size -= safeSizeOf(key, previous);
            }
        }
        if (previous != null) {
            entryRemoved(false, key, previous, value);
        }
        //每次新加入对象都需要调用trimToSize方法看是否需要回收
        trimToSize(maxSize);
        return previous;
    }
    /**
     * @param maxSize the maximum size of the cache before returning. May be -1
     *     to evict even 0-sized elements.
     * 此方法根据maxSize来调整内存cache的大小,如果maxSize传入-1,则清空缓存中的所有对象
     */
    private void trimToSize(int maxSize) {
        while (true) {
            K key;
            V value;
            synchronized (this) {
                if (size < 0 || (map.isEmpty() && size != 0)) {
                    throw new IllegalStateException(getClass().getName()
                            + ".sizeOf() is reporting inconsistent results!");
                }
                //如果当前size小于maxSize或者map没有任何对象,则结束循环
                if (size <= maxSize || map.isEmpty()) {
                    break;
                }
                //移除链表头部的元素,并进入下一次循环
                Map.Entry<K, V> toEvict = map.entrySet().iterator().next();
                key = toEvict.getKey();
                value = toEvict.getValue();
                map.remove(key);
                size -= safeSizeOf(key, value);
                evictionCount++;  //回收次数+1
            }
            entryRemoved(true, key, value, null);
        }
    }
    /**
     * Removes the entry for {@code key} if it exists.
     *
     * @return the previous value mapped by {@code key}.
     * 从内存缓存中根据key值移除某个对象并返回该对象
     */
    public final V remove(K key) {
        if (key == null) {
            throw new NullPointerException("key == null");
        }
        V previous;
        synchronized (this) {
            previous = map.remove(key);
            if (previous != null) {
                size -= safeSizeOf(key, previous);
            }
        }
        if (previous != null) {
            entryRemoved(false, key, previous, null);
        }
        return previous;
    }
    /**
     * Called for entries that have been evicted or removed. This method is
     * invoked when a value is evicted to make space, removed by a call to
     * {@link #remove}, or replaced by a call to {@link #put}. The default
     * implementation does nothing.
     *
     * <p>The method is called without synchronization: other threads may
     * access the cache while this method is executing.
     *
     * @param evicted true if the entry is being removed to make space, false
     *     if the removal was caused by a {@link #put} or {@link #remove}.
     * @param newValue the new value for {@code key}, if it exists. If non-null,
     *     this removal was caused by a {@link #put}. Otherwise it was caused by
     *     an eviction or a {@link #remove}.
     */
    protected void entryRemoved(boolean evicted, K key, V oldValue, V newValue) {}
    /**
     * Called after a cache miss to compute a value for the corresponding key.
     * Returns the computed value or null if no value can be computed. The
     * default implementation returns null.
     *
     * <p>The method is called without synchronization: other threads may
     * access the cache while this method is executing.
     *
     * <p>If a value for {@code key} exists in the cache when this method
     * returns, the created value will be released with {@link #entryRemoved}
     * and discarded. This can occur when multiple threads request the same key
     * at the same time (causing multiple values to be created), or when one
     * thread calls {@link #put} while another is creating a value for the same
     * key.
     */
    protected V create(K key) {
        return null;
    }
    private int safeSizeOf(K key, V value) {
        int result = sizeOf(key, value);
        if (result < 0) {
            throw new IllegalStateException("Negative size: " + key + "=" + value);
        }
        return result;
    }
    /**
     * Returns the size of the entry for {@code key} and {@code value} in
     * user-defined units.  The default implementation returns 1 so that size
     * is the number of entries and max size is the maximum number of entries.
     *
     * <p>An entry's size must not change while it is in the cache.
     * 用来计算单个对象的大小,这里默认返回1,一般需要重写该方法来计算对象的大小
     * xUtils中创建LruMemoryCache时就重写了sizeOf方法来计算bitmap的大小
     * mMemoryCache = new LruMemoryCache<MemoryCacheKey, Bitmap>(globalConfig.getMemoryCacheSize()) {
     *       @Override
     *       protected int sizeOf(MemoryCacheKey key, Bitmap bitmap) {
     *           if (bitmap == null) return 0;
     *           return bitmap.getRowBytes() * bitmap.getHeight();
     *       }
     *   };
     *
     */
    protected int sizeOf(K key, V value) {
        return 1;
    }
    /**
     * Clear the cache, calling {@link #entryRemoved} on each removed entry.
     * 清空内存缓存
     */
    public final void evictAll() {
        trimToSize(-1); // -1 will evict 0-sized elements
    }
    /**
     * For caches that do not override {@link #sizeOf}, this returns the number
     * of entries in the cache. For all other caches, this returns the sum of
     * the sizes of the entries in this cache.
     */
    public synchronized final int size() {
        return size;
    }
    /**
     * For caches that do not override {@link #sizeOf}, this returns the maximum
     * number of entries in the cache. For all other caches, this returns the
     * maximum sum of the sizes of the entries in this cache.
     */
    public synchronized final int maxSize() {
        return maxSize;
    }
    /**
     * Returns the number of times {@link #get} returned a value.
     */
    public synchronized final int hitCount() {
        return hitCount;
    }
    /**
     * Returns the number of times {@link #get} returned null or required a new
     * value to be created.
     */
    public synchronized final int missCount() {
        return missCount;
    }
    /**
     * Returns the number of times {@link #create(Object)} returned a value.
     */
    public synchronized final int createCount() {
        return createCount;
    }
    /**
     * Returns the number of times {@link #put} was called.
     */
    public synchronized final int putCount() {
        return putCount;
    }
    /**
     * Returns the number of values that have been evicted.
     */
    public synchronized final int evictionCount() {
        return evictionCount;
    }
    /**
     * Returns a copy of the current contents of the cache, ordered from least
     * recently accessed to most recently accessed.
     */
    public synchronized final Map<K, V> snapshot() {
        return new LinkedHashMap<K, V>(map);
    }
    @Override public synchronized final String toString() {
        int accesses = hitCount + missCount;
        int hitPercent = accesses != 0 ? (100 * hitCount / accesses) : 0;
        return String.format("LruCache[maxSize=%d,hits=%d,misses=%d,hitRate=%d%%]",
                maxSize, hitCount, missCount, hitPercent);
    }
}
Android 关于使用LruCache缓存你想缓存的数据.
相信大家做开发的时候都知道请求网络数据的重要,但是有一些只用请求一次就过时性的消息比如某些新闻信息,如果我们每次进入新闻界面就从新从网络上获取势必会给用户带来不好的体验,所以我们需要缓存技术来帮我们解决这一问题。
1,LruCache介绍
核心的类是LruCache (此类在android-support-v4的包中提供) 。这个类非常适合用来缓存图片,它的主要算法原理是把最近使用的对象用强引用存储在 LinkedHashMap 中,并且把最近最少使用的对象在缓存值达到预设定值之前从内存中移除。
在过去,我们经常会使用一种非常流行的内存缓存技术的实现,即软引用或弱引用 (SoftReference or WeakReference)。但是现在已经不再推荐使用这种方式了,因为从 Android 2.3 (API Level 9)开始,垃圾回收器会更倾向于回收持有软引用或弱引用的对象,这让软引用和弱引用变得不再可靠。另外,Android 3.0 (API Level 11)中,图片的数据会存储在本地的内存当中,因而无法用一种可预见的方式将其释放,这就有潜在的风险造成应用程序的内存溢出并崩溃。
2,LruCache使用
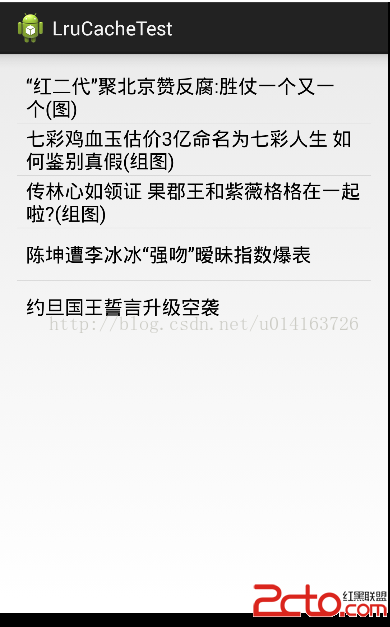
下面我们就来写一个简单的demo来学习LruCache,效果也是每次请求一次第二次直接从缓存中提取出来不用再次请求网络
/**
 * 缓存json数据
 */
private LruCache<integer, string=""> mJsonCache;
/**
 * 缓存图片信息
 */
private LruCache<integer, bitmap=""> mBitmapCache;
public Util() {
    mJsonCache = new LruCache<integer, string="">(1 * 1024 * 1024);
    mBitmapCache = new LruCache<integer, bitmap="">(2 * 1024 * 1024);
}
/**
 * 添加进入缓存列表
 *
 * @param key
 * @param value
 */
public void addJsonLruCache(Integer key, String value) {
    mJsonCache.put(key, value);
}
public void addBitmapLruCache(Integer key, Bitmap value) {
    mBitmapCache.put(key, value);
}
/**
 * 从缓存列表中拿出来
 *
 * @param key
 * @return
 */
public String getJsonLruCache(Integer key) {
    return mJsonCache.get(key);
}
public Bitmap getBitmapLruCache(Integer key) {
    return mBitmapCache.get(key);
}</integer,></integer,></integer,></integer,>
可以看到我们准备缓存Bitmap与String,只需要拿到信息的时候put进缓存中,需要的时候get出来,是不是非常简单,我们为我们String分配了1m为我们的Bitmap分配了2m空间,这只是我们的demo为了简单这样使用,实际上我们应该更加详细的考虑到底应该为缓存分配多大的空间
// 获取到可用内存的最大值,使用内存超出这个值会引起OutOfMemory异常。
// LruCache通过构造函数传入缓存值,以KB为单位。
int maxMemory = (int) (Runtime.getRuntime().maxMemory() / 1024);
一般来说最大值的1/8左右就可以了。
public class MainActivity extends Activity implements OnItemClickListener {
    private static final String LIST_DATA = http://api.yi18.net/top/list;
    private ListView mListView;
    private ArrayAdapter<string> mAdapter;
    private ArrayList<integer> mListId;
    private Util util;

    protected void onCreate(Bundle savedInstanceState) {
        super.onCreate(savedInstanceState);
        setContentView(R.layout.activity_main);
        util = new Util();
        mListView = (ListView) findViewById(R.id.list);
        mListId = new ArrayList<integer>();
        mAdapter = new ArrayAdapter<string>(this,
                android.R.layout.simple_list_item_1);
        mListView.setAdapter(mAdapter);
        mListView.setOnItemClickListener(this);
        new DownLoadJson().execute(LIST_DATA);
    }</string></integer></integer></string>

这一段就是普通的请求数据添加到ListView中。

private void getJsonData(String json) {
        try {
            JSONObject jsonObject = new JSONObject(json);
            if (jsonObject.getBoolean(success)) {
                JSONArray jsonArray = jsonObject.getJSONArray(yi18);
                for (int i = 0; i < jsonArray.length(); i++) {
                    JSONObject jsonObject2 = (JSONObject) jsonArray.opt(i);
                    if (i < 5) {
                        mAdapter.add(jsonObject2.getString(title));
                        mListId.add(jsonObject2.getInt(id));
                    }
                }
            }
        } catch (JSONException e) {
            // TODO Auto-generated catch block
            e.printStackTrace();
        }
    }

    class DownLoadJson extends AsyncTask<string, string=""> {

        @Override
        protected String doInBackground(String... params) {
            return util.downLoadJson(params[0]);
        }

        @Override
        protected void onPostExecute(String result) {
            if (result != null) {
                getJsonData(result);
            }
        }

    }</string,>
我们就简单的取了前五条数据用来模拟我们的新闻,用的是热点热词的Api。
3,缓存
@Override
    public void onItemClick(AdapterView<!--?--> arg0, View arg1, int arg2, long arg3) {
        // TODO Auto-generated method stub
        String message = util.getJsonLruCache(mListId.get(arg2));
        Bitmap bitmap = util.getBitmapLruCache(mListId.get(arg2));

        if (message != null) {
            intentNewsInfo(arg2, message, bitmap);
        } else {
            intentNewsInfo(arg2, null, null);
        }

    }

    public void intentNewsInfo(int arg2, String message, Bitmap bitmap) {
        Intent intent = new Intent(MainActivity.this, NewsinfoActivity.class);
        intent.putExtra(message, message);
        intent.putExtra(bitmap, bitmap);
        intent.putExtra(index, arg2);
        intent.putExtra(id, mListId.get(arg2));
        startActivityForResult(intent, 100);
    }
可以看到我们这里先是查找缓存中是否存在数据如果存在直接传给新闻详情界面,如果没有则在第二个界面获取再传回来。
public class NewsinfoActivity extends Activity {

    private String NEWS_INFO = http://api.yi18.net/top/show?id=;
    private String imageRes[] = {
            http://d.hiphotos.baidu.com/image/h%3D360/sign=405b763459afa40f23c6c8db9b65038c/562c11dfa9ec8a13508c96e6f403918fa0ecc026.jpg,
            http://c.hiphotos.baidu.com/image/h%3D360/sign=798b4f82caea15ce5eeee60f86013a25/9c16fdfaaf51f3dece3f986397eef01f3a297923.jpg,
            http://f.hiphotos.baidu.com/image/h%3D360/sign=20a94e03940a304e4d22a6fce1c9a7c3/ac4bd11373f082028719ab3848fbfbedab641b29.jpg,
            http://b.hiphotos.baidu.com/image/h%3D360/sign=3a1af7349145d688bc02b4a294c37dab/4b90f603738da977c0f5b82cb351f8198718e3db.jpg,
            http://d.hiphotos.baidu.com/image/h%3D360/sign=75e596560f33874483c5297a610ed937/55e736d12f2eb9381891b2f4d6628535e5dd6f3c.jpg };
    private Intent intent;
    private Util util;
    private int newId, index;
    private ImageView imageView;
    private TextView textView;
    private Bitmap bitmap;
    private String message;

    protected void onCreate(Bundle savedInstanceState) {
        super.onCreate(savedInstanceState);
        setContentView(R.layout.activity_newsinfo);
        intent = getIntent();
        util = new Util();
        imageView = (ImageView) findViewById(R.id.image);
        textView = (TextView) findViewById(R.id.message);
        newId = intent.getExtras().getInt(id);
        index = intent.getExtras().getInt(index);
        if (intent.getExtras().getString(message) != null) {
            message = intent.getExtras().getString(message);
            bitmap = intent.getParcelableExtra(bitmap);
            textView.setText(Html.fromHtml(message));
            imageView.setImageBitmap(bitmap);
            Toast.makeText(this, 没有访问网络哦, 2000).show();
        } else {
            new DownLoadJson().execute(NEWS_INFO + newId);
            new DownLoadBitmap().execute(imageRes[index]);
            Toast.makeText(this, 访问网络哦, 2000).show();
        }

    }

    @Override
    public void onBackPressed() {
        Intent dataIntent = new Intent();
        dataIntent.putExtra(message, message);
        dataIntent.putExtra(bitmap, bitmap);
        dataIntent.putExtra(newId, newId);
        setResult(20, dataIntent);
        finish();
        super.onBackPressed();
    }

    private void getJsonData(String json) {
        try {
            JSONObject jsonObject = new JSONObject(json);
            if (jsonObject.getBoolean(success)) {
                JSONObject jsonObject2 = new JSONObject(
                        jsonObject.getString(yi18));
                message = jsonObject2.getString(message);
                textView.setText(Html.fromHtml(jsonObject2.getString(message)));
            }
        } catch (JSONException e) {
            // TODO Auto-generated catch block
            e.printStackTrace();
        }
    }

    class DownLoadJson extends AsyncTask<string, string=""> {

        @Override
        protected String doInBackground(String... params) {
            return util.downLoadJson(params[0]);
        }

        @Override
        protected void onPostExecute(String result) {
            if (result != null) {
                getJsonData(result);
            }
        }

    }

    class DownLoadBitmap extends AsyncTask<string, bitmap=""> {

        @Override
        protected Bitmap doInBackground(String... params) {
            // TODO Auto-generated method stub
            return util.downLoadBitmap(params[0]);
        }

        @Override
        protected void onPostExecute(Bitmap result) {
            if (result != null) {
                bitmap = result;
                imageView.setImageBitmap(result);
            }
        }
    }

}</string,></string,>
这就比较清晰明白了,每次我们都把这个界面获取到的信息存到LruCache里面。
@Override
protected void onActivityResult(int requestCode, int resultCode, Intent data) {
    int newId = data.getExtras().getInt(newId);
    String message = data.getExtras().getString(message);
    Bitmap bitmap = data.getParcelableExtra(bitmap);
    util.addJsonLruCache(newId, message);
    util.addBitmapLruCache(newId, bitmap);
    super.onActivityResult(requestCode, resultCode, data);
}
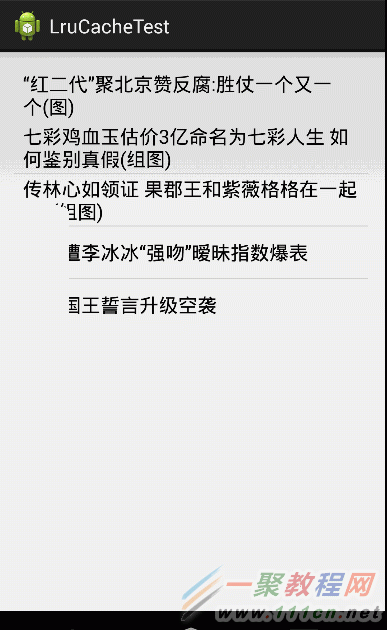
4,效果 
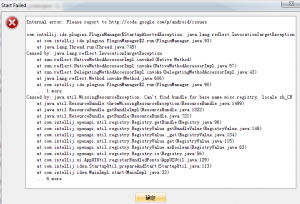
安装好AndroidStudio 之后,出现如下页面,叉掉重新打开也不行,就求救“度娘”:算是解决了:

首先这个报错原因是说:Studio 打开的时候,可能弹出“Fetching Android SDK component information” 要获取 sdk 组件的信息,这个获取过程可能会很长,也不一定能够成功的获取。所以会出现这种报错信息。
解决方法如下:
找到AndroidStudio 安装目录,找到bin 目录,打开bin 目录,找到 idea.properties文件。打开此文件,打开方式,随便自己,只要能打开就行:
然后在文件的末尾加上这样一句话:
disable.android.first.run=true
这句话的意思就是:打开AndroidStudio 的时候,不去获取 Android SDK 的信息,这样就不会报错了。然后重启 Studio 即可。
断点调试我们做程序开发的人员肯定是知道这种方式了,不但可以设置同时我们也可以使用断点调试机制来实现,下面来看看。
安卓程序中,遇到最多报错,其中一种空指针问题,空指针说起来:好解决! 也不好解决.
好解决的是说:明显的空指针问题,没有实例化类,控件或者id 找错的。都会出现空指针问题。
不好解决的空指针是:通常是这种情况,在一个请求里面,又写了一个网络请求。就相当于在一个线程里面又开了一个线程。因为我们不能确定第一个线程是否执行完毕了,或者说执行了一半的时候,不能确保线程执行完毕的情况。当然这种情况不一定就是网络请求才会出现。也有可能是执行了非常耗时的工作。所以,不推荐在一个线程中,又开启另一个耗时的线程。如果遇到特殊情况,非要开启一个线程的,请确保两个线程都能执行完毕。
遇到空指针的问题,如何解决才是最关键的: 通常我们发现空指针的问题的是,程序崩溃停止运行,通过log 日志打印,我们可以从控制台中,直接定位到某一行,那说明就是这一行报了空指针的问题。因为是一行代码 :实例如下:
doSetLocation(res_city_id,latitude,lontitude);
像上面的这行代码,一共传了三个参数,既然这行报了空指针,一定有的参数值是空的,没有获取到值,或者说没有赋值成功。解决方法是:首先你可以自己确定有哪些参数是一定不为空的,有哪些是可能为空的。至于怎么看,要根据实际情况来看,也可以凭借经验,哪一个可能为空。
当我们不确定哪一个参数为空的时候,就需要手动调试,而断点调试则是我们调试手段最常用,并且是最有效的一个手段。它可以帮你定位到每一个参数的传值情况,这样就能一步一步找出问题所在。
还有一种情况是,断点也找不到的错误。因为断点调试,直接跳出方法,不执行。这个也常见,但是也必须要解决的问题。
之前就遇到了,下面一段代码如下:
private List<NameValuePair> params;

 public JSONParser(Context context,Boolean isLoginOrRegister){

this.isLoginOrRegister=isLoginOrRegister;

this.context=context;

init();

}

 public String makeHttpRequest2(String url, String method, String jsonStr) {

 try {

else if (method == "GET") {

// request method is GET


String paramString = URLEncodedUtils.format(params, "utf-8");

url += "?" + paramString;

HttpGet httpGet = new HttpGet(url);

} catch (Exception e) {

e.printStackTrace();

}

return json;

}
使用情况如下,当我走”GET“方法时。直接抛出空指针异常,没有走里面的方法。当我定位报错信息时,显示 params 报空。当时一看到这也是蒙了。因为怕什么来什么,网络请求经常用,但是封装网络请求却是不太了解。因为params为空,就去找 params 在哪里初始化,这时候,会发现。最上面的两个构造方法,
有一个带params的参数的构造方法,一个却是不带params的构造方法。而我使用的恰好是不带params 参数的构造方法。当时我发现没有这个参数,就把参数加上去不就可以了吗,后来发现加上去也是错的。
首先搞清构造方法是什么?构造方法是,构造方法是在你调用的时候,他就帮你实例化参数,或者实例化一些需要new 出来的类。
发现了这个,你就会发现第二个构造方法,虽然使用了params 但是却没有实例化。找到问题解决问题就很方便了。只需要在构造方法里面实例化即可。不使用参数方式的实例化。
public JSONParser(Context context,Boolean isLoginOrRegister){

   this.isLoginOrRegister=isLoginOrRegister;

   this.context=context;

   params=new ArrayList<NameValuePair>();

   init();

 }
相关文章
- 下面我们来看一篇关于Android子控件超出父控件的范围显示出来方法,希望这篇文章能够帮助到各位朋友,有碰到此问题的朋友可以进来看看哦。 <RelativeLayout xmlns:an...2016-10-02
- 这篇文章主要介绍了详解如何清理redis集群的所有数据,文中通过示例代码介绍的非常详细,对大家的学习或者工作具有一定的参考学习价值,需要的朋友们下面随着小编来一起学习学习吧...2021-02-18
- 这篇文章主要给大家介绍了关于C#创建自定义控件及添加自定义属性和事件使用的相关资料,文中通过示例代码介绍的非常详细,对大家学习或者使用C#具有一定的参考学习价值,需要的朋友们下面来一起学习学习吧...2020-06-25
- 本文实例讲述了JS实现自定义简单网页软键盘效果。分享给大家供大家参考,具体如下:这是一款自定义的简单点的网页软键盘,没有使用任何控件,仅是为了练习JavaScript编写水平,安全性方面没有过多考虑,有顾虑的可以不用,目的是学...2015-11-08
Android开发中findViewById()函数用法与简化
findViewById方法在android开发中是获取页面控件的值了,有没有发现我们一个页面控件多了会反复研究写findViewById呢,下面我们一起来看它的简化方法。 Android中Fin...2016-09-20- 如果我们的项目需要做来电及短信的功能,那么我们就得在Android模拟器开发这些功能,本来就来告诉我们如何在Android模拟器上模拟来电及来短信的功能。 在Android模拟...2016-09-20
- 夜神android模拟器如何设置代理呢?对于这个问题其实操作起来是非常的简单,下面小编来为各位详细介绍夜神android模拟器设置代理的方法,希望例子能够帮助到各位。 app...2016-09-20
- 为了增强android应用的用户体验,我们可以在一些Button按钮上自定义动态的设置一些样式,比如交互时改变字体、颜色、背景图等。 今天来看一个通过重写Button来动态实...2016-09-20
- 如果我们要在Android应用APP中加载html5页面,我们可以使用WebView,本文我们分享两个WebView加载html5页面实例应用。 实例一:WebView加载html5实现炫酷引导页面大多...2016-09-20
- 深入理解Android中View和ViewGroup从组成架构上看,似乎ViewGroup在View之上,View需要继承ViewGroup,但实际上不是这样的。View是基类,ViewGroup是它的子类。本教程我们深...2016-09-20
- 下面我们来看一篇关于Android自定义WebView网络视频播放控件开发例子,这个文章写得非常的不错下面给各位共享一下吧。 因为业务需要,以下代码均以Youtube网站在线视...2016-10-02
- 自定义一个jquery模态窗口插件,将它集成到现有平台框架中时,它只能在mainFrame窗口中显示,无法在顶层窗口显示. 解决这个问题的办法: 通过以下代码就可能实现在顶层窗口弹窗 复制代码 代码如下: $(window.top.documen...2014-05-31
- java开发的Android应用,性能一直是一个大问题,,或许是Java语言本身比较消耗内存。本文我们来谈谈Android 性能优化之MemoryFile文件读写。 Android匿名共享内存对外A...2016-09-20
- 这篇文章主要介绍了自定义feignClient的常见坑及解决方案,具有很好的参考价值,希望对大家有所帮助。如有错误或未考虑完全的地方,望不吝赐教...2021-10-20
- TextView默认是横着显示了,今天我们一起来看看Android设置TextView竖着显示如何来实现吧,今天我们就一起来看看操作细节,具体的如下所示。 在开发Android程序的时候,...2016-10-02
- 今天小编就为大家分享一篇pytorch 自定义卷积核进行卷积操作方式,具有很好的参考价值,希望对大家有所帮助。一起跟随小编过来看看吧...2020-05-06
android.os.BinderProxy cannot be cast to com解决办法
本文章来给大家介绍关于android.os.BinderProxy cannot be cast to com解决办法,希望此文章对各位有帮助呀。 Android在绑定服务的时候出现java.lang.ClassCastExc...2016-09-20- 这篇文章主要介绍了Android 实现钉钉自动打卡功能的步骤,帮助大家更好的理解和学习使用Android,感兴趣的朋友可以了解下...2021-03-15
PHP YII框架开发小技巧之模型(models)中rules自定义验证规则
YII的models中的rules部分是一些表单的验证规则,对于表单验证十分有用,在相应的视图(views)里面添加了表单,在表单被提交之前程序都会自动先来这里面的规则里验证,只有通过对其有效的限制规则后才能被提交,可以很有效地保证...2015-11-24- 这篇文章主要介绍了jquery自定义插件开发之window的实现过程的相关资料,需要的朋友可以参考下...2016-05-09
